
Quick Reference Guide for Initial Website Configuration
OVERVIEW - Site Configuration
To properly configure your website, there are (five) basic elements that need to be setup. These are described in more detail below.
(A) Site Header – This has your logo, menu bar, etc.
(B) Website email configuration – This controls how emails are sent from the website
(C) Verify License Keys (Elementor, WPForms, Event Manager, ultimate Manager)
(A) Site Header
A1. Site Logo
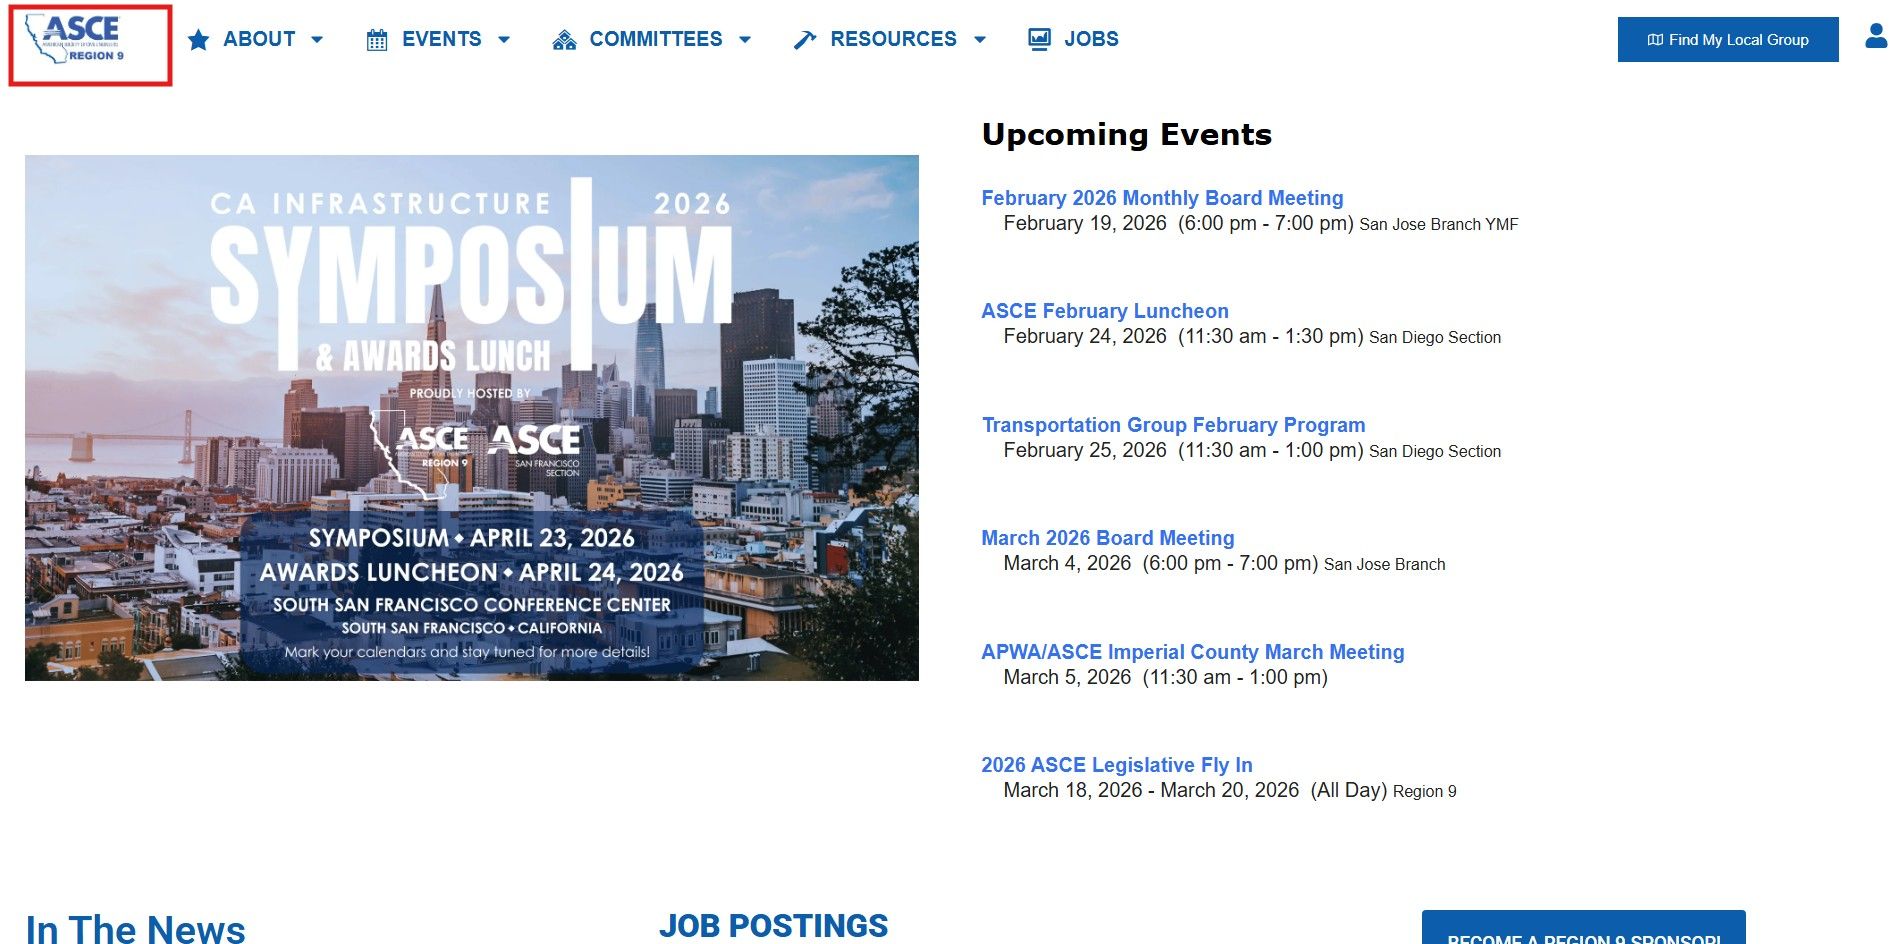
1.1 Setting the site logo
Click each image to enlarge.
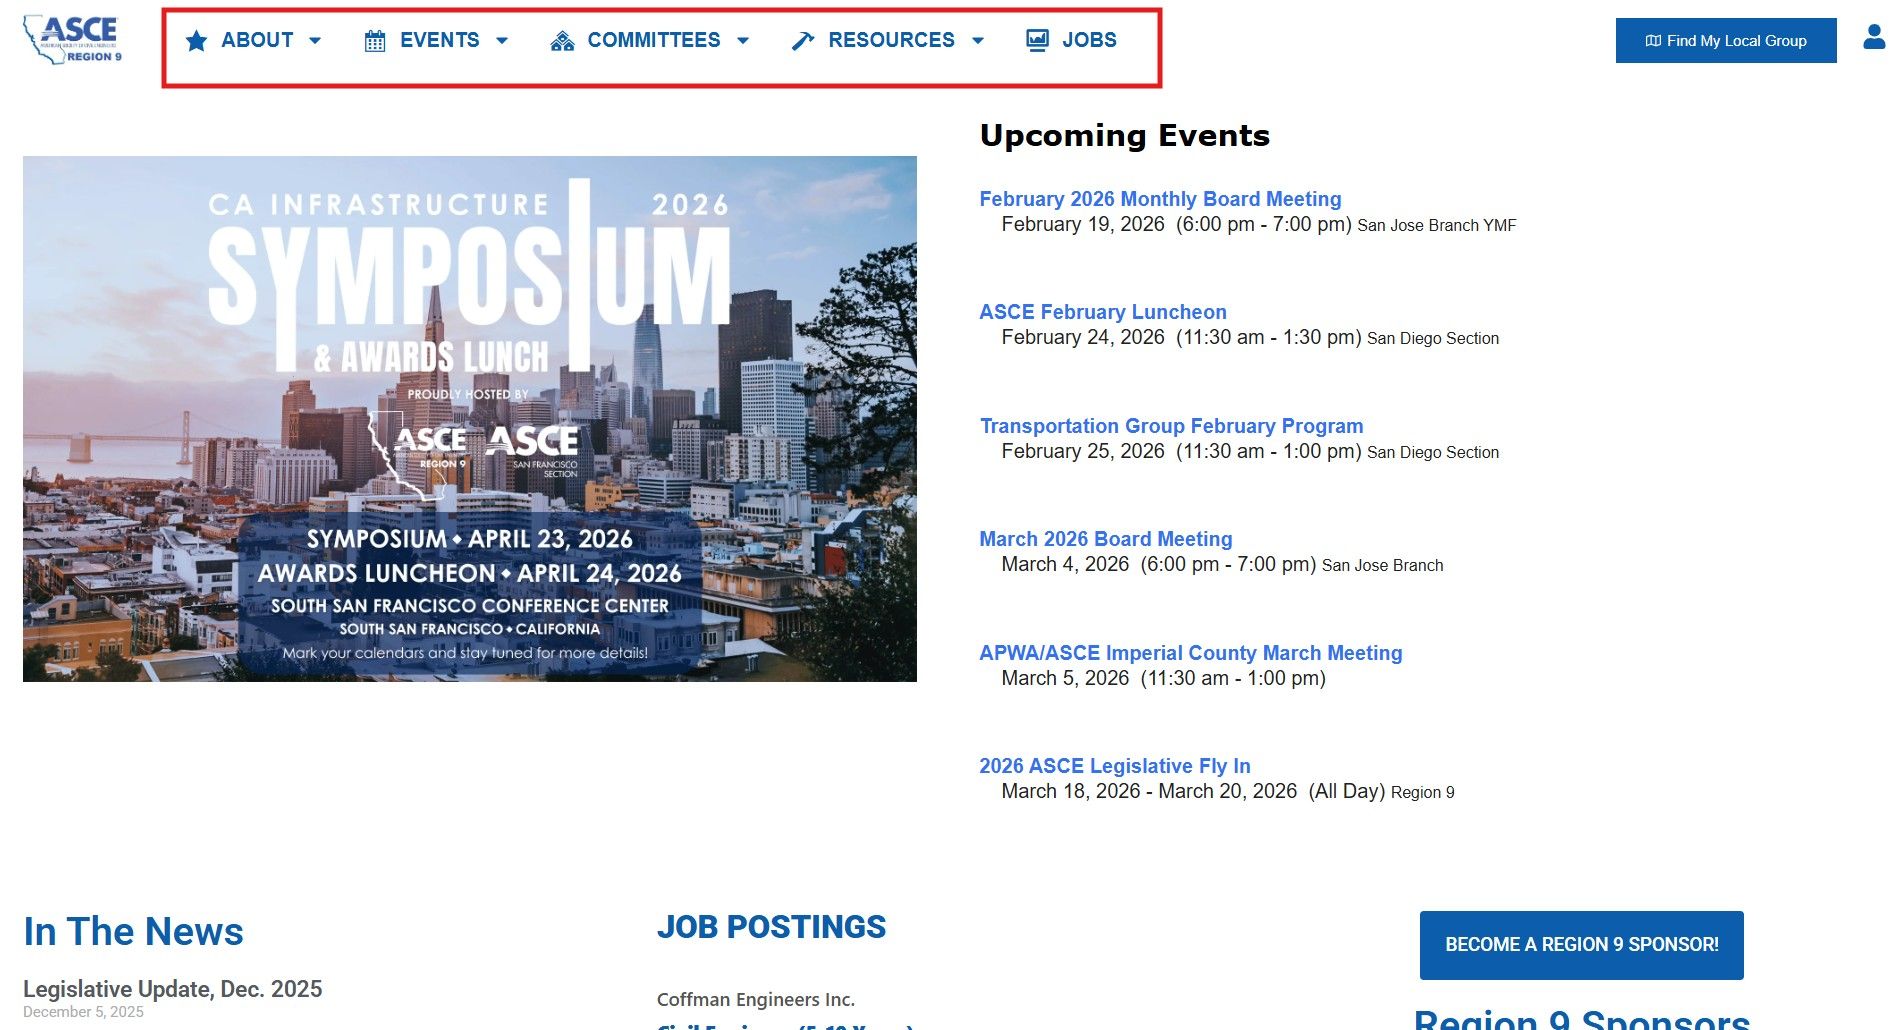
A2. Navigation Menus
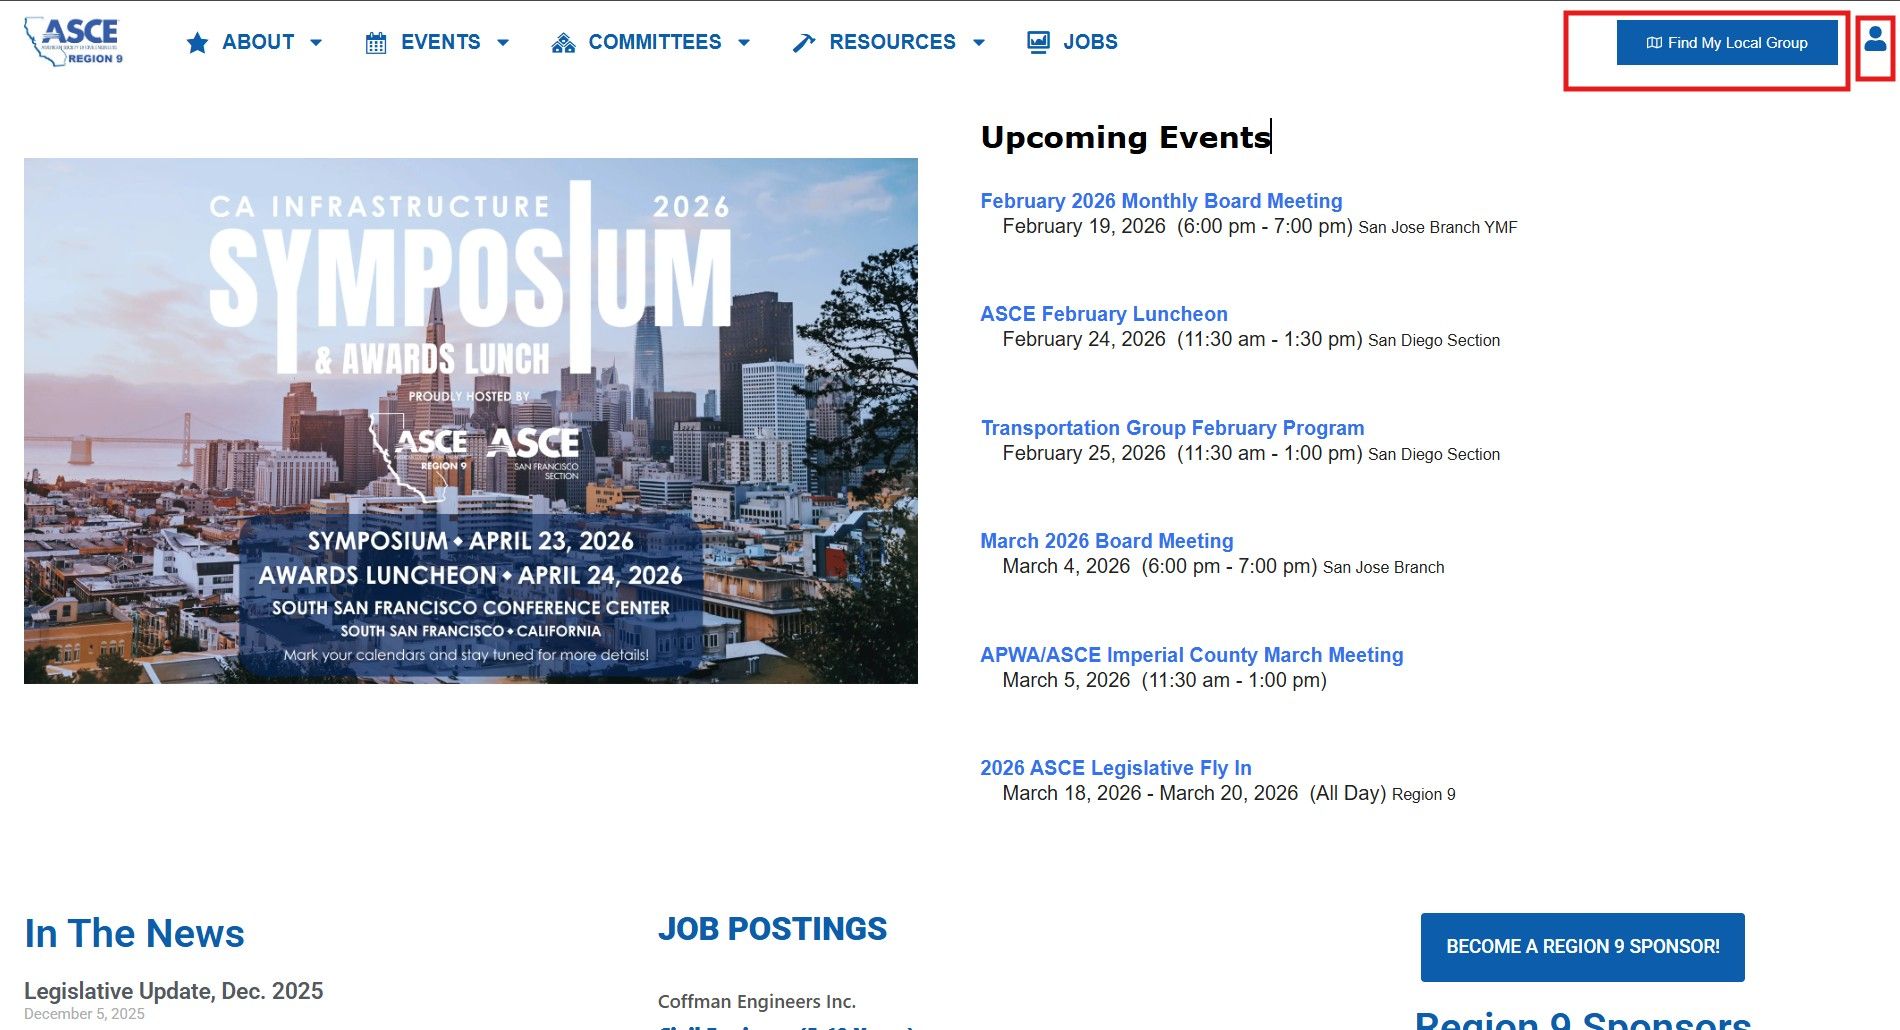
A3. Local Group Button and Login
Site Logo
The site logo represents the brand’s core identity and is configured early in the setup to maintain a unified look across headers, menus, and digital assets.
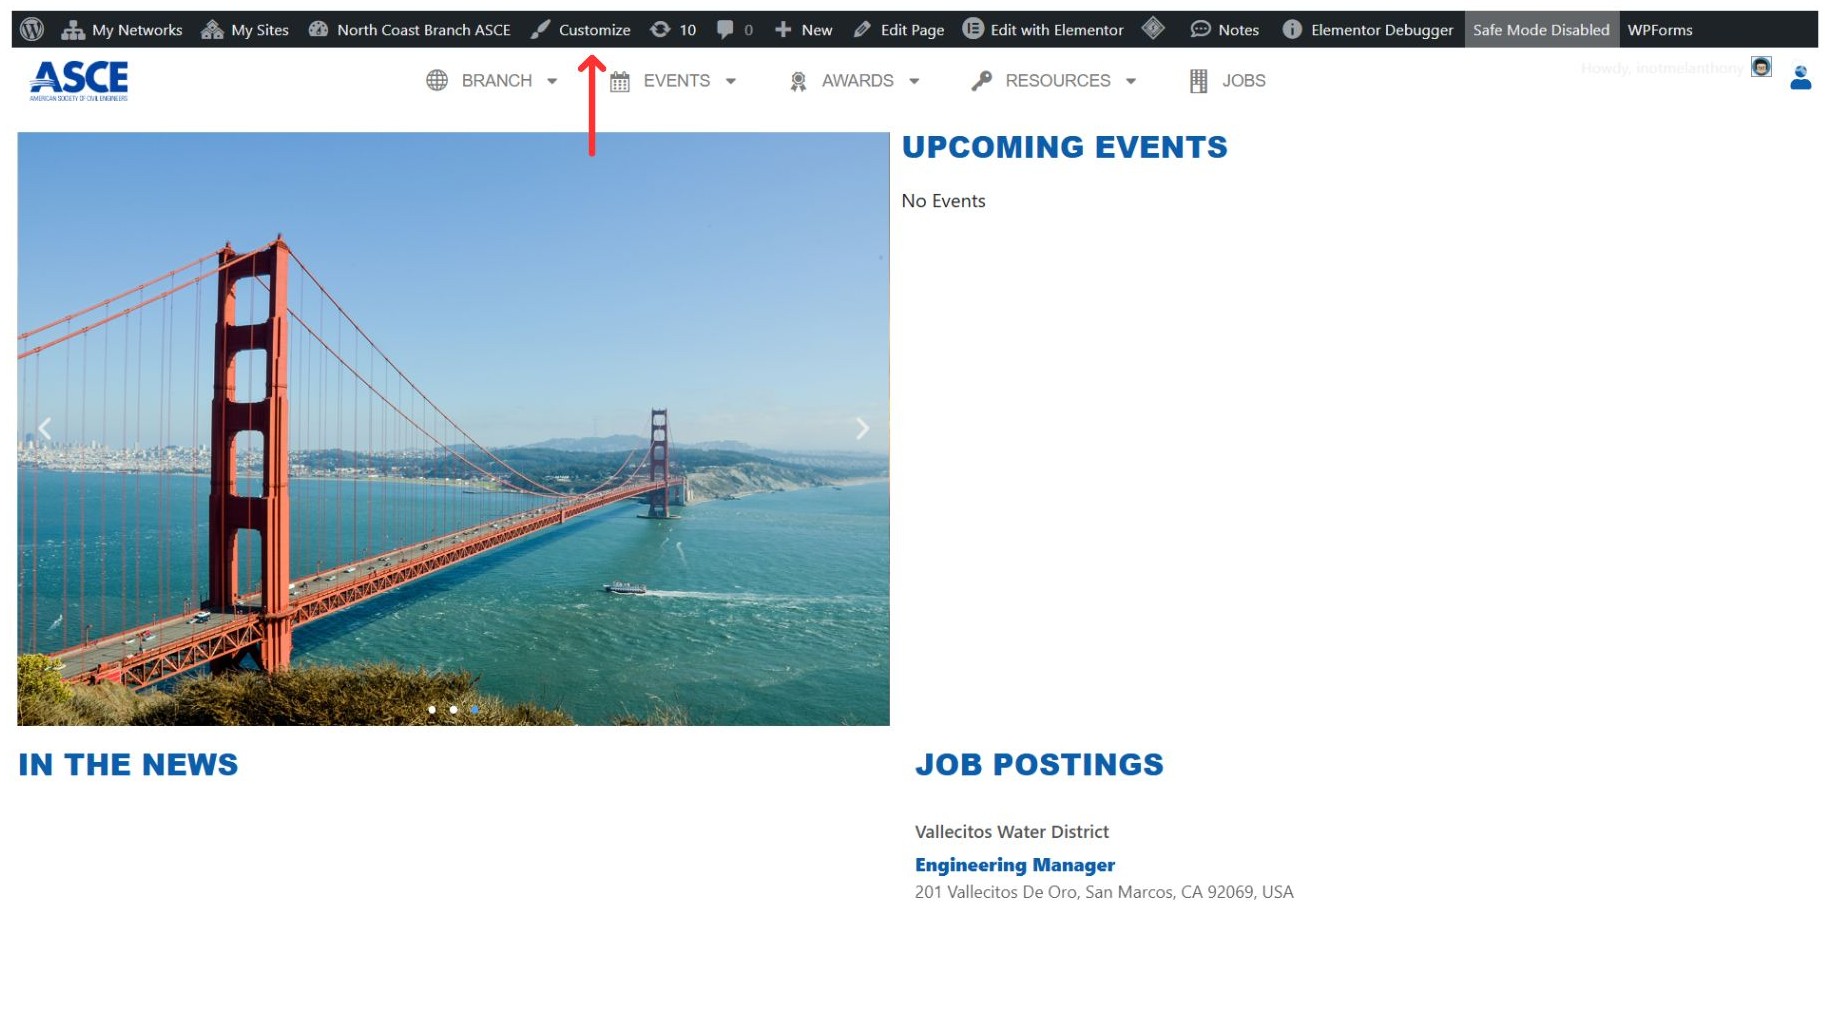
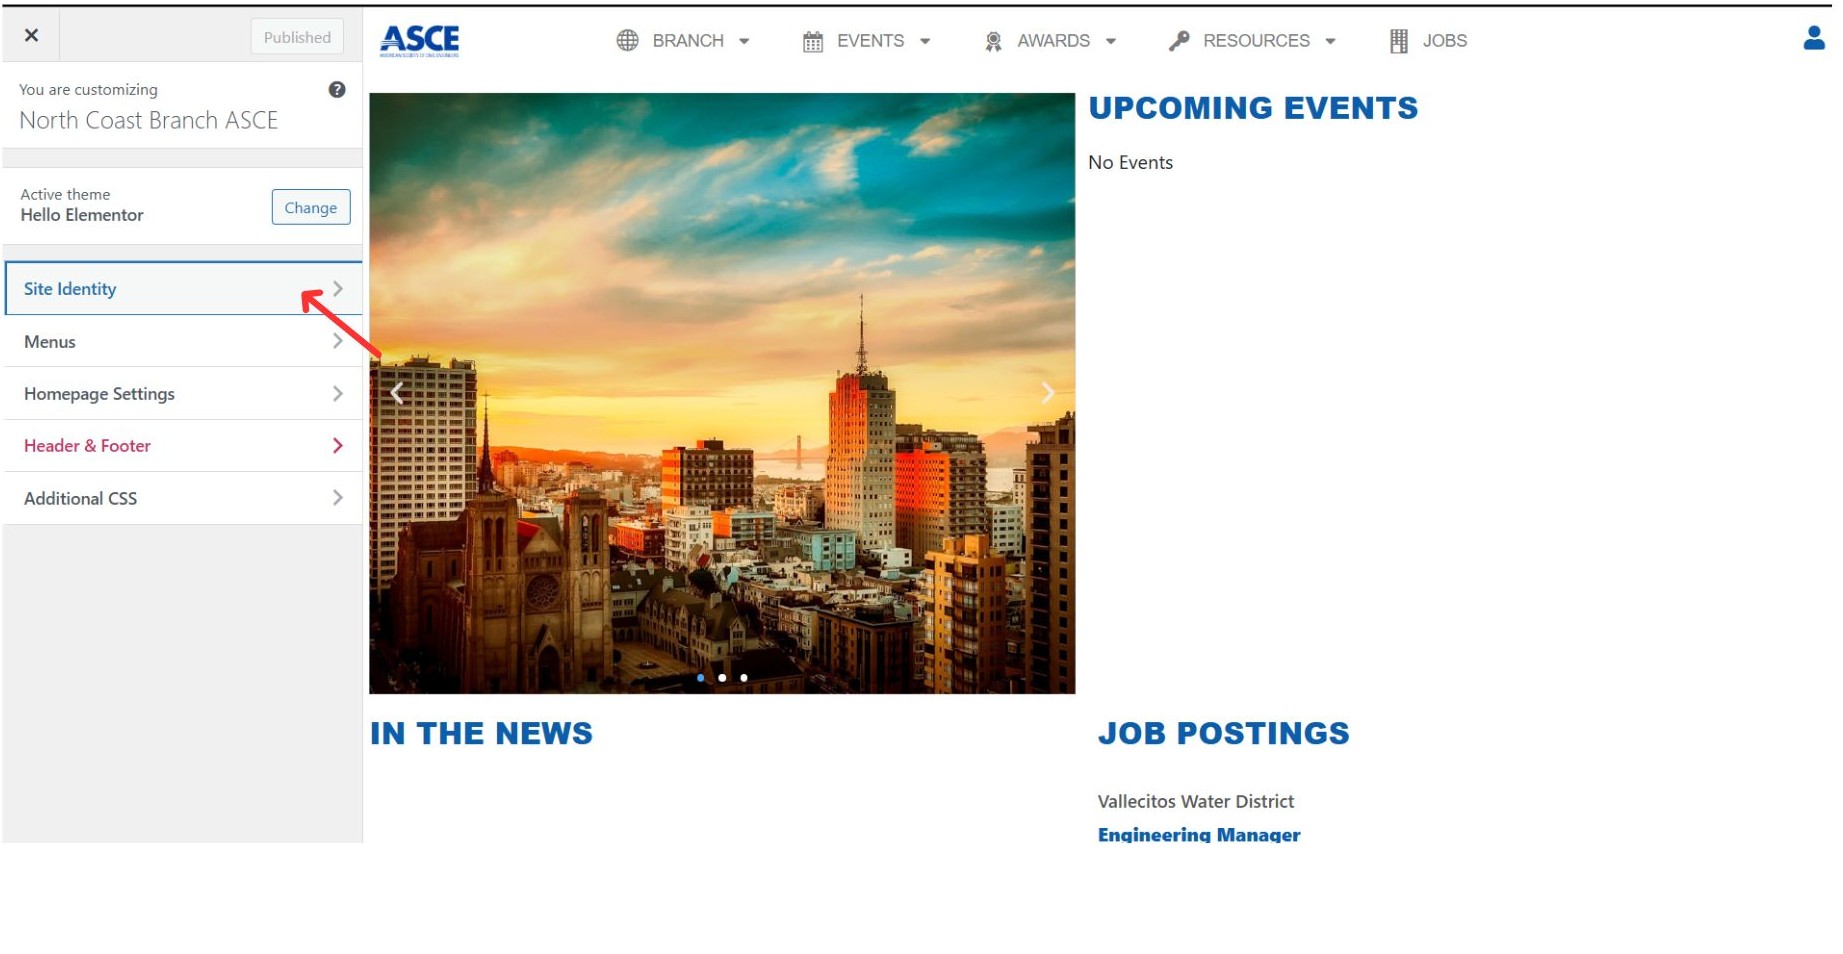
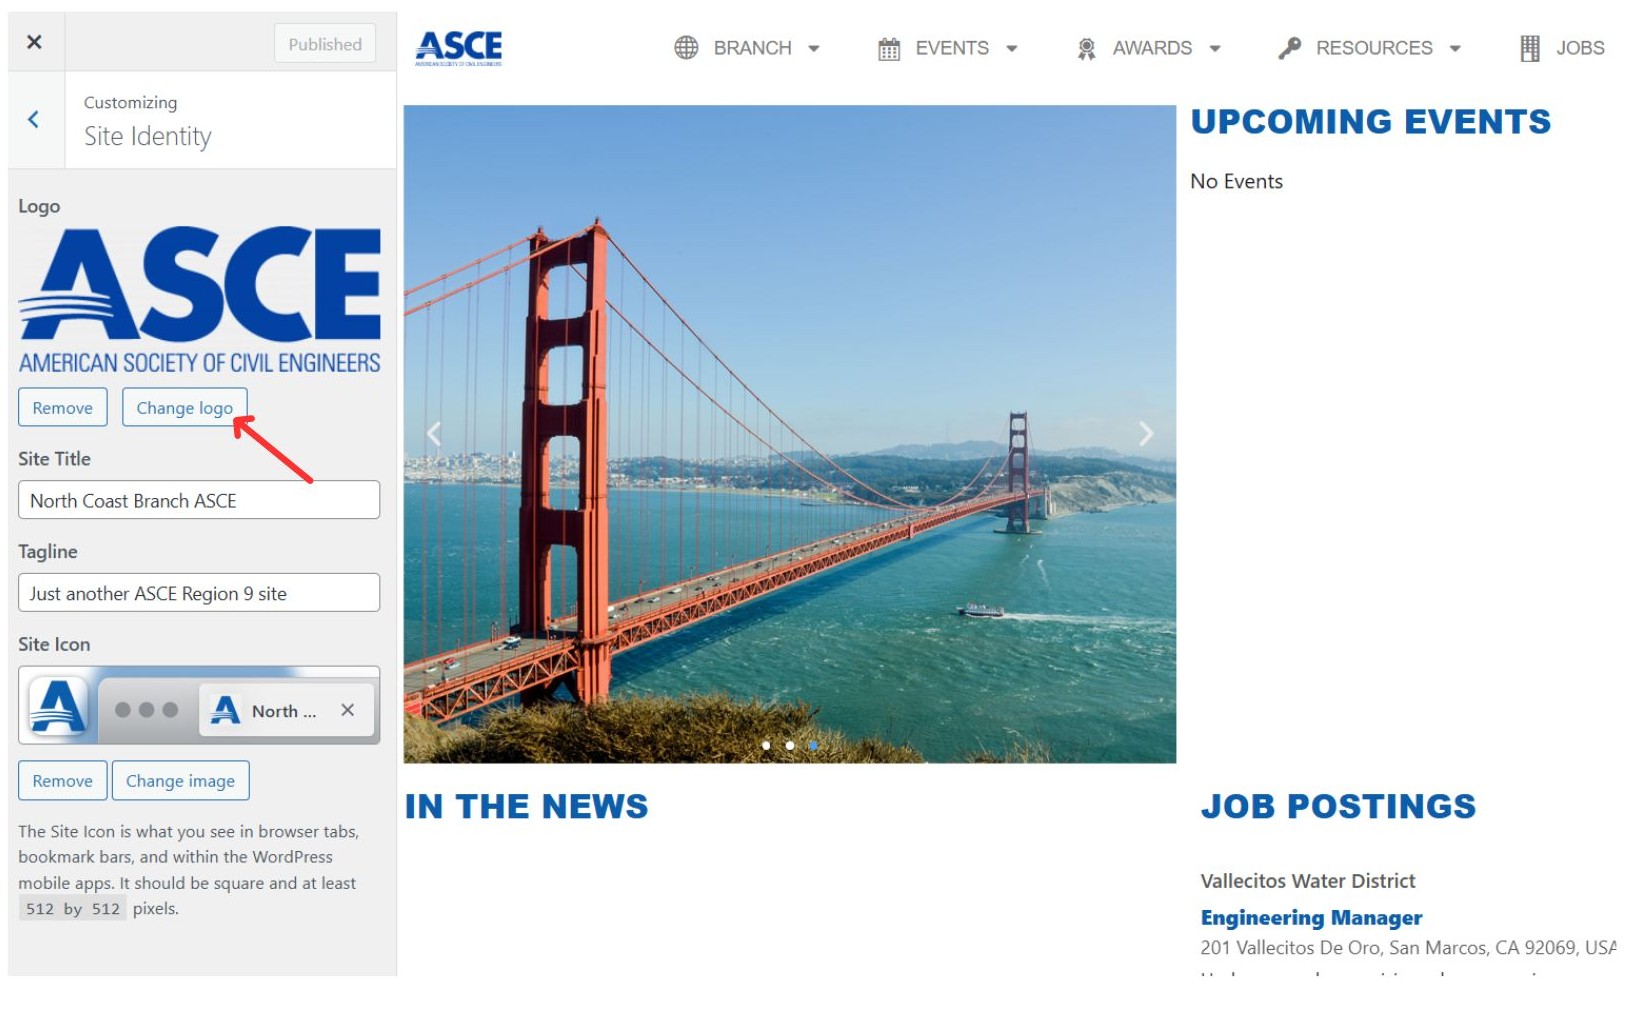
Setting the site logo:
- Go to Customize
- Click Site Identity
- Select Logo
- Upload image
- Publish
Tip: You must be logged in as admin.
Navigation Menus
The navigation menu is set up during website configuration to organize pages, improve usability, and maintain a consistent site structure.
Find My Local Group Button
The Find My Local Group button directs users to the official ASCE community locator, helping them easily discover and connect with nearby local groups.
Login Icon
The Login button provides secure access for members or administrators to enter their accounts and manage personalized features
Note: The header configuration includes the site logo for branding, structured navigation menus for easy page access, a Find My Local Group button that redirects users to the official ASCE community locator, and a secure login option that allows members to access their accounts and personalized features.
Tip: You must be logged in as an Administrator to edit and configure these elements. Use Elementor for visual editing and layout adjustments — it allows you to easily update the site logo, navigation menus, external buttons, and login components through a real-time drag-and-drop interface while maintaining design consistency across the website.
(B) WP Mail SMTP Configuration
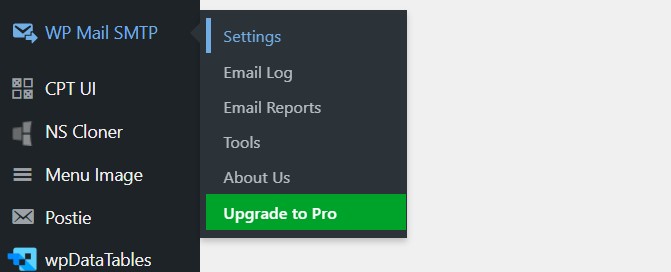
1. WP Mail SMTP Menu Access
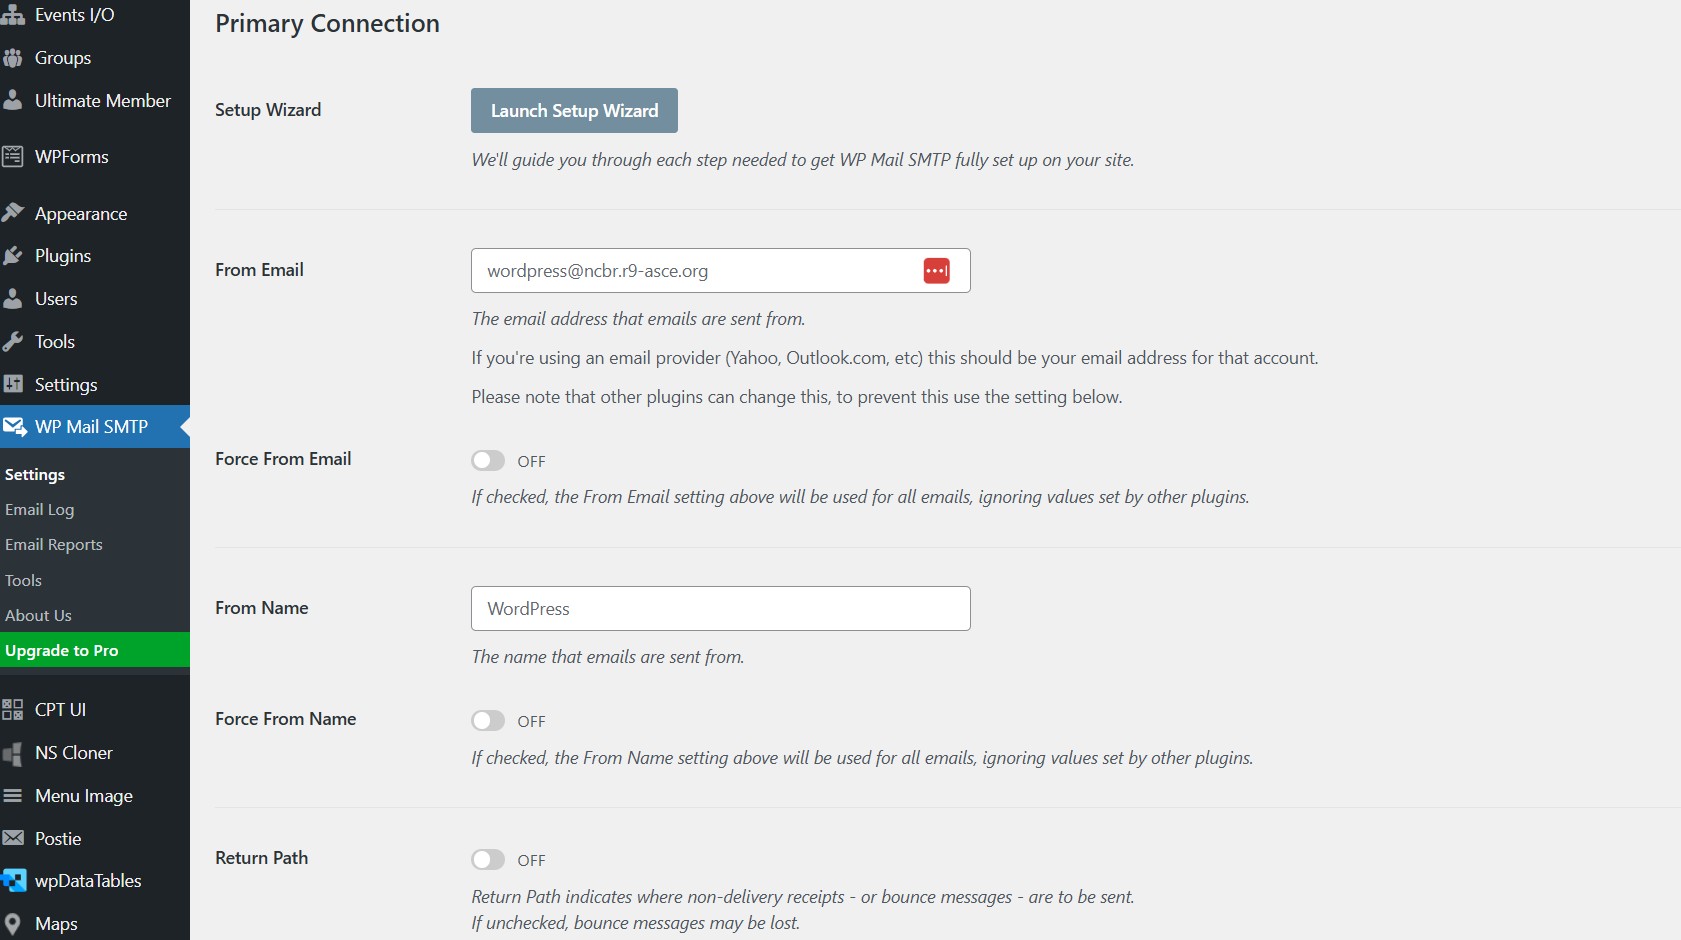
2. Primary Connections
2.Mailer Selection
WP Mail SMTP Menu Access
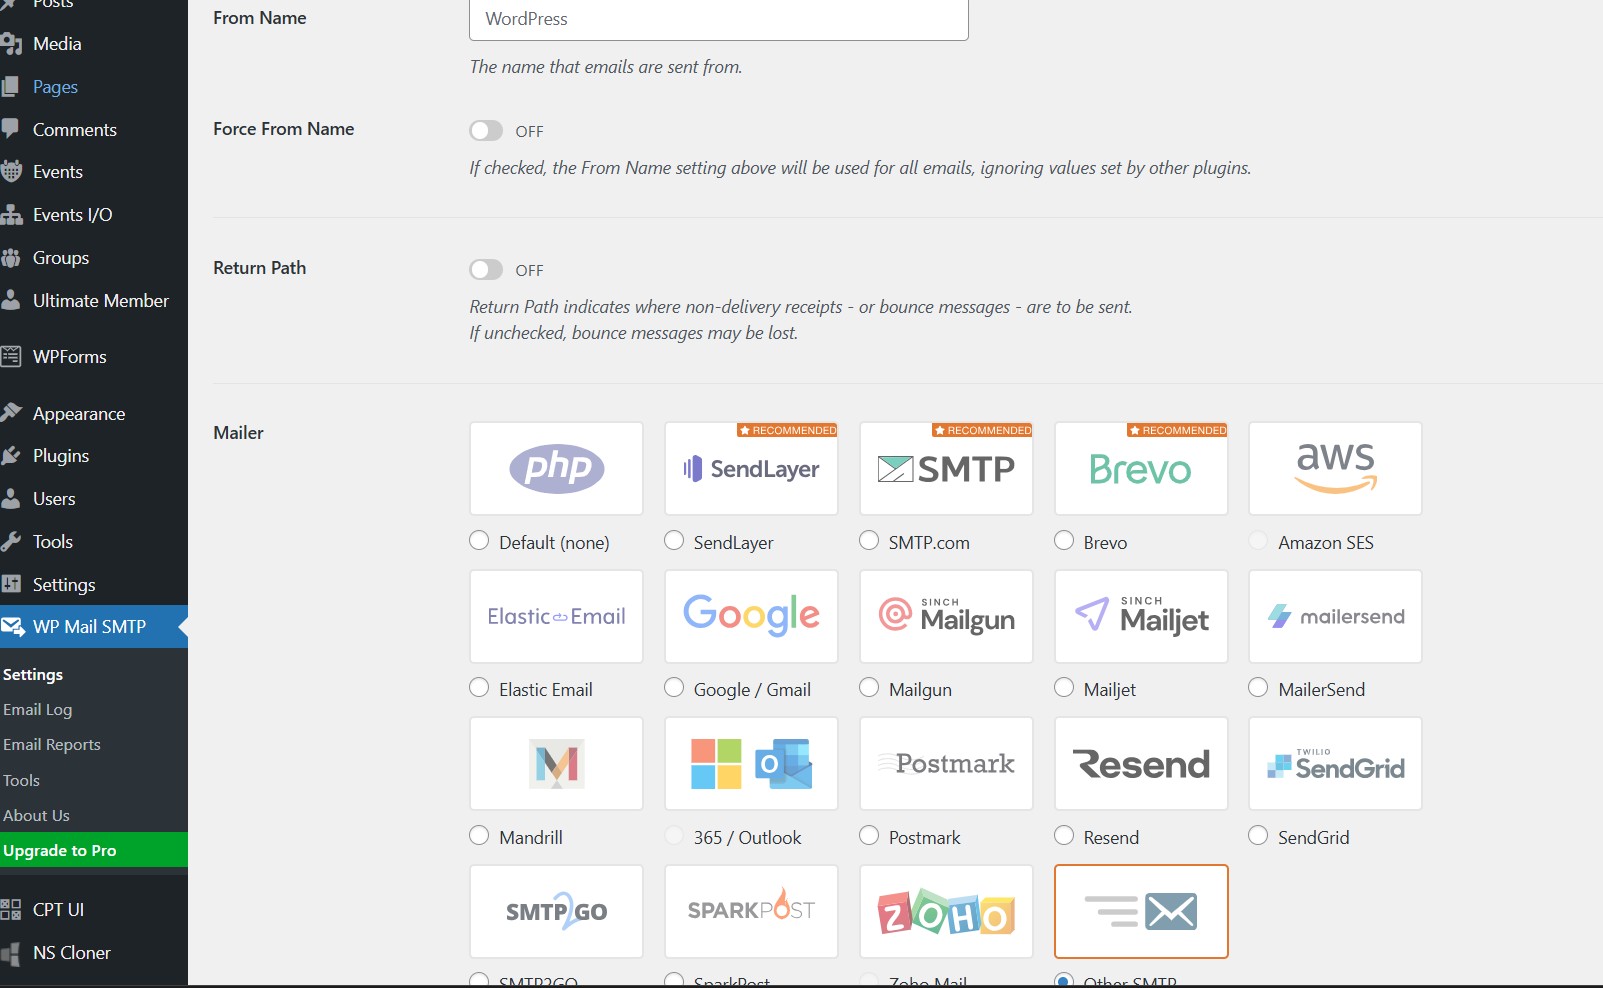
The WP Mail SMTP menu provides access to Settings, Email Logs, Reports, and Tools. Administrators use this area to configure mailer options, monitor email activity, troubleshoot delivery issues, and manage SMTP-related features.
Primary Connection Settings
The Primary Connection panel is where the main email configuration is set, including the From Email, From Name, and optional settings like Force From Email and Return Path. These settings define how outgoing emails appear and help improve deliverability and authentication.
Mailer Selection
This section allows the Administrator to choose the email mailer service used by the website. Select the appropriate SMTP provider (such as Other SMTP, Google, SendGrid, or AWS) to ensure reliable email delivery for forms, notifications, and system messages.
The WP Mail SMTP configuration ensures that all website emails are sent securely and reliably by setting up the correct mailer service, defining sender details, and managing email delivery settings. Administrators can access this section to configure SMTP connections, monitor email activity, and troubleshoot any email-related issues within the website.
Tip: You must be logged in as an Administrator to configure WP Mail SMTP settings. Make sure to select the correct mailer, use a valid From Email that matches your domain, and enable recommended options like Force From Email when needed to improve email deliverability and prevent messages from going to spam. For example: Gmail: smtp.gmail.com / 587 / TLS
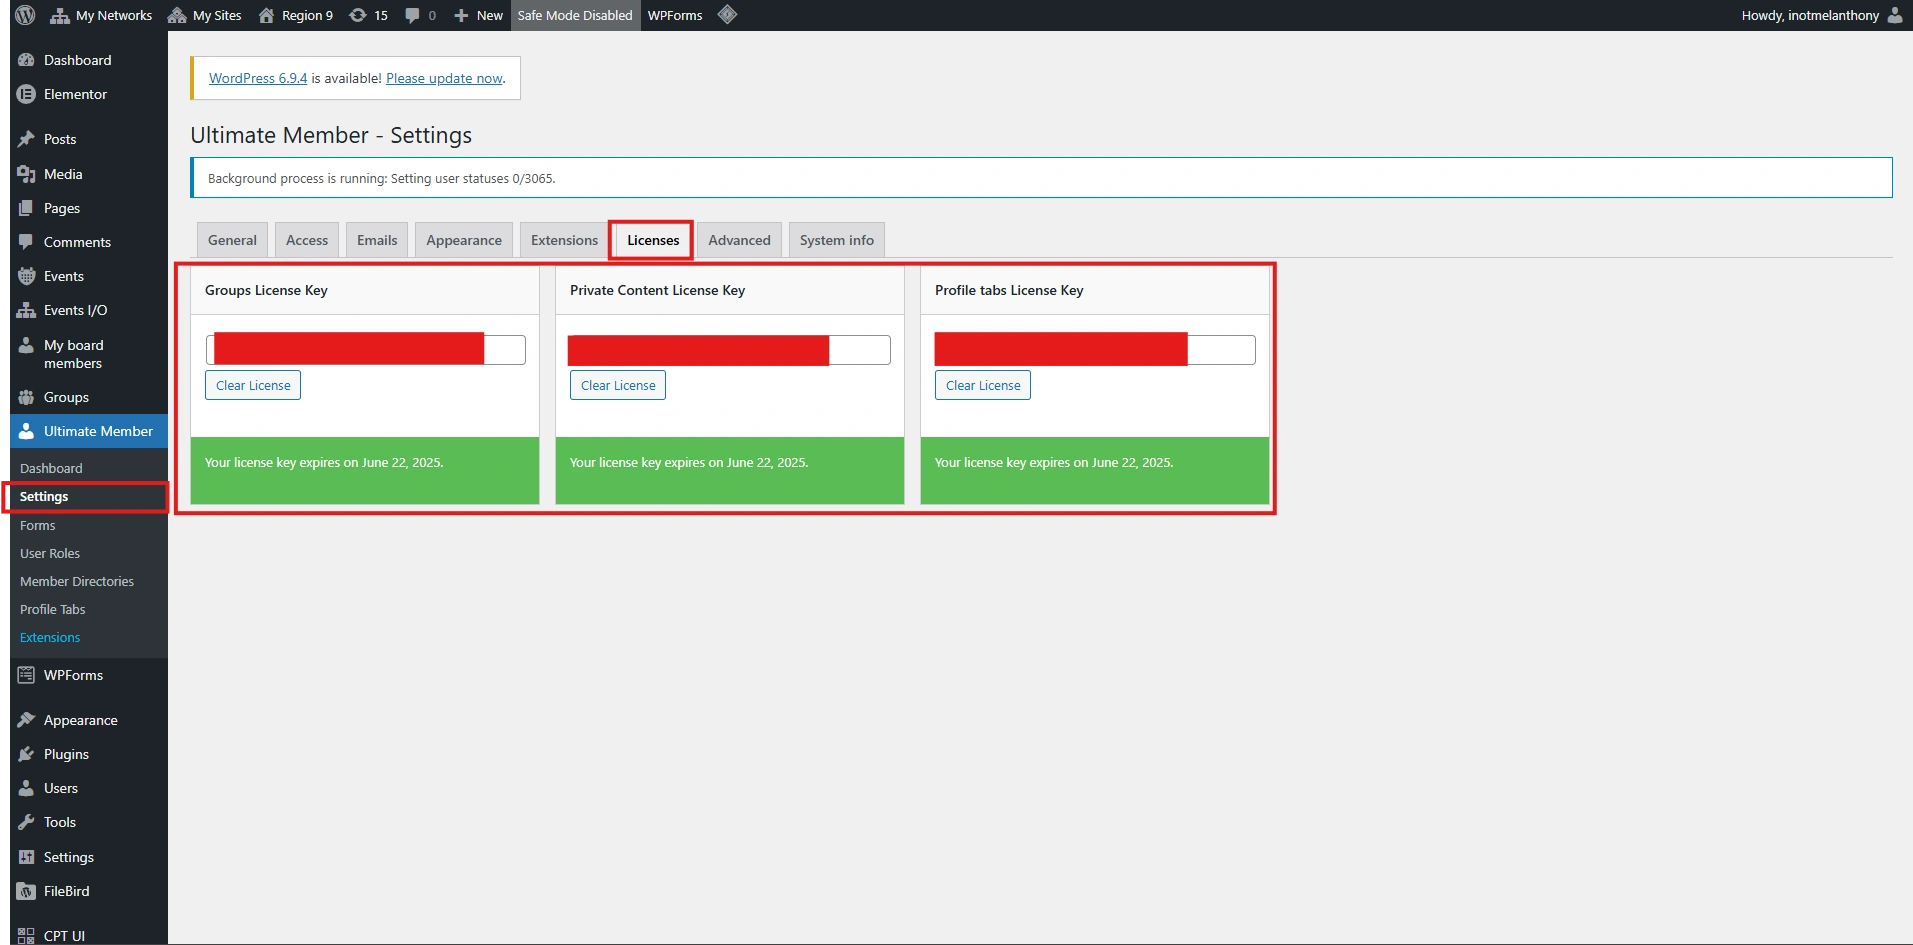
(C) Verify License Keys
1. Elementor
2. WPForms
3. Event Manager
4. Ultimate Manager
Elementor
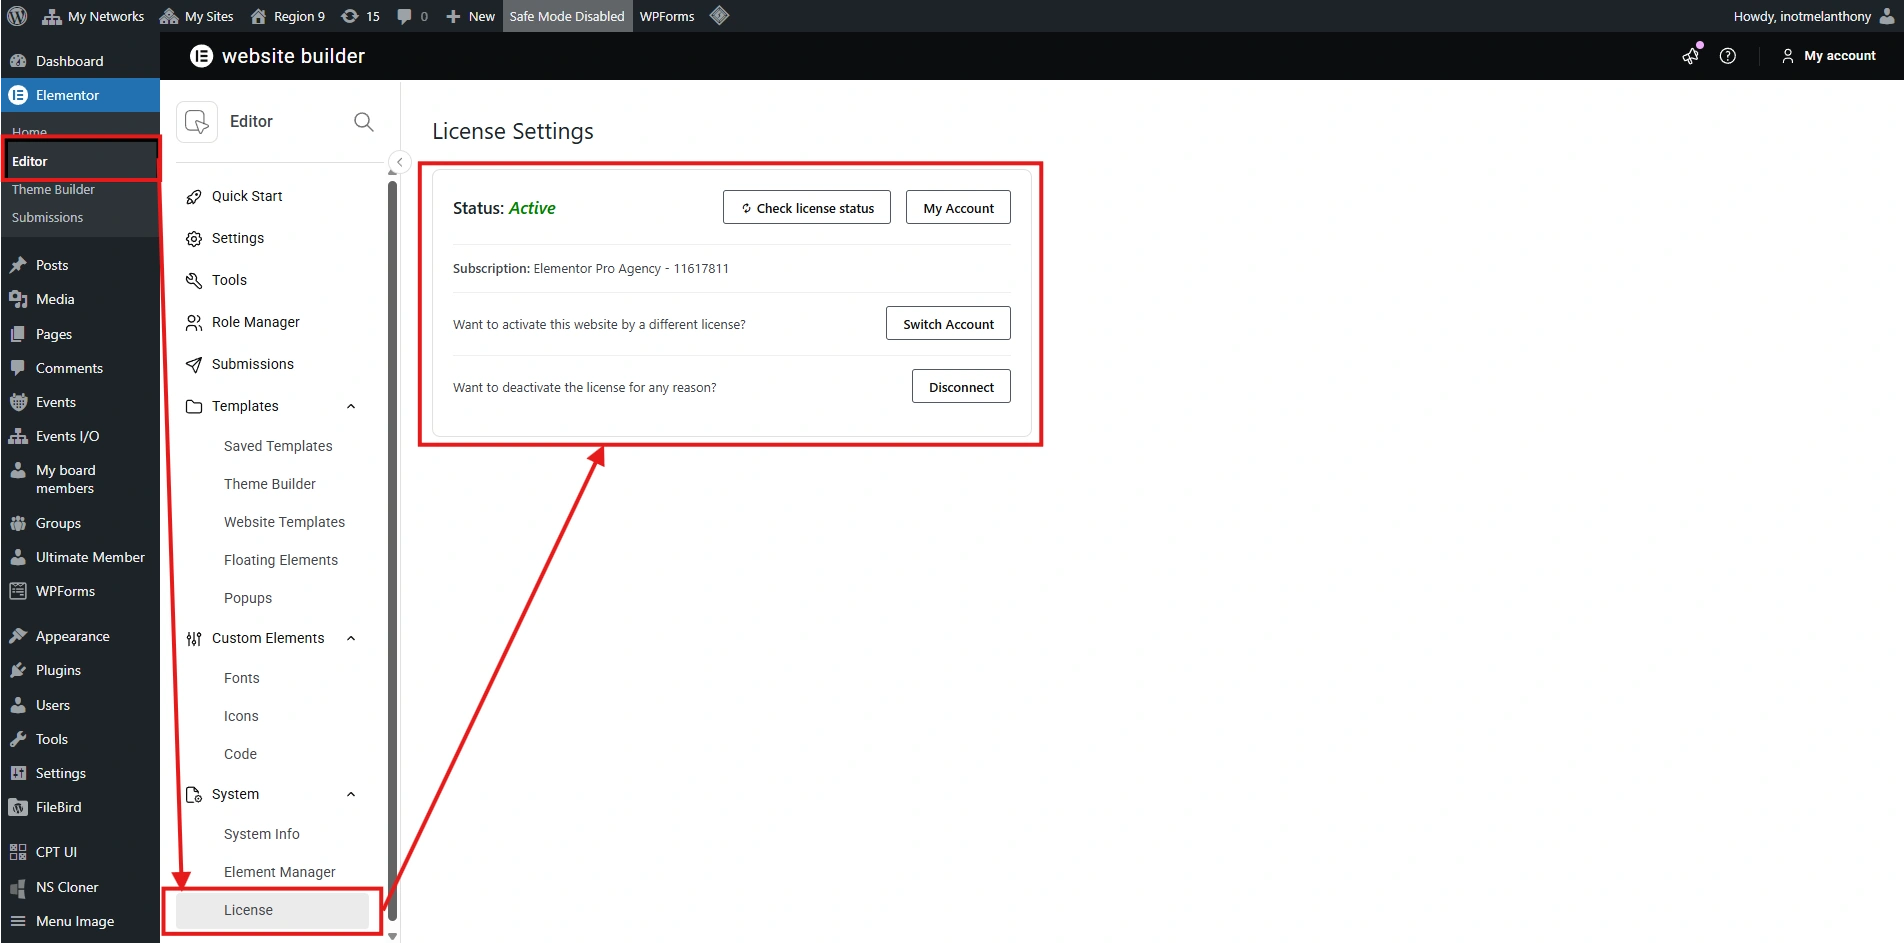
The Elementor menu provides access to the page builder, global settings, templates, and tools used to design and customize website pages visually. Administrators and editors can use Elementor to build layouts, manage reusable templates, and control design settings without writing code.
WPForms
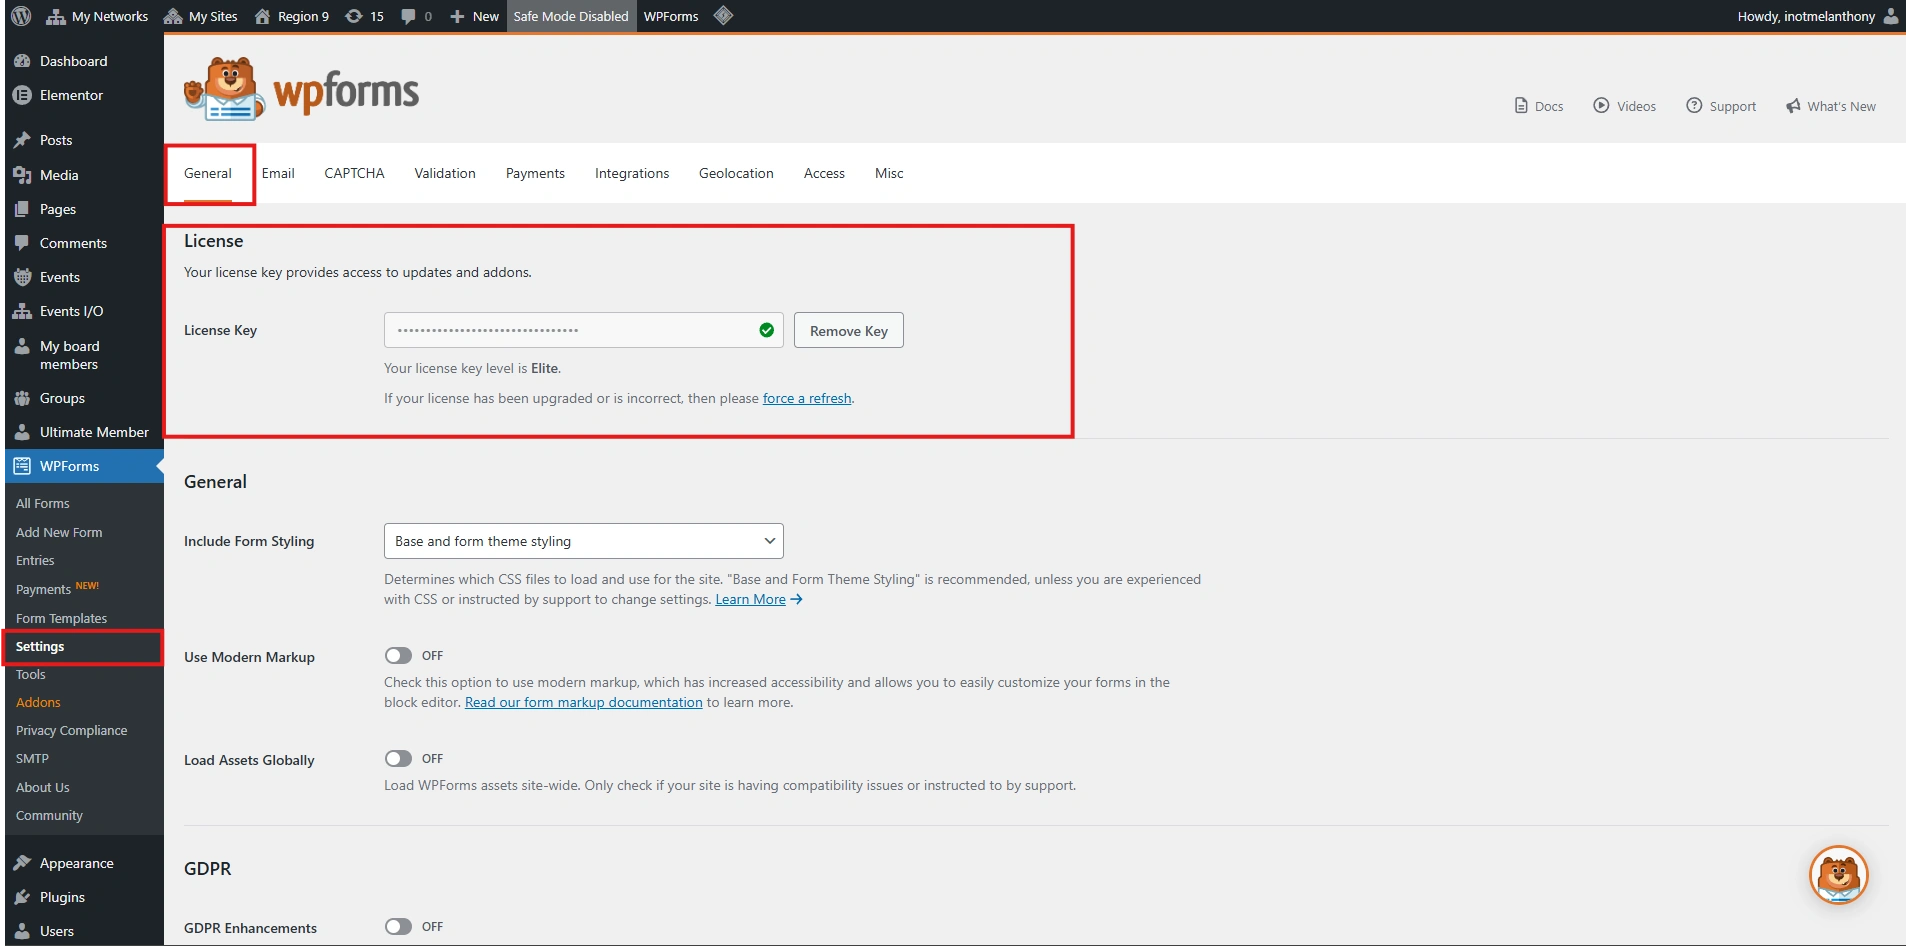
The WPForms menu provides access to form creation, form management, entries, and settings. Administrators use this section to build contact forms, surveys, booking forms, and other data collection forms used across the website.
Event Manager
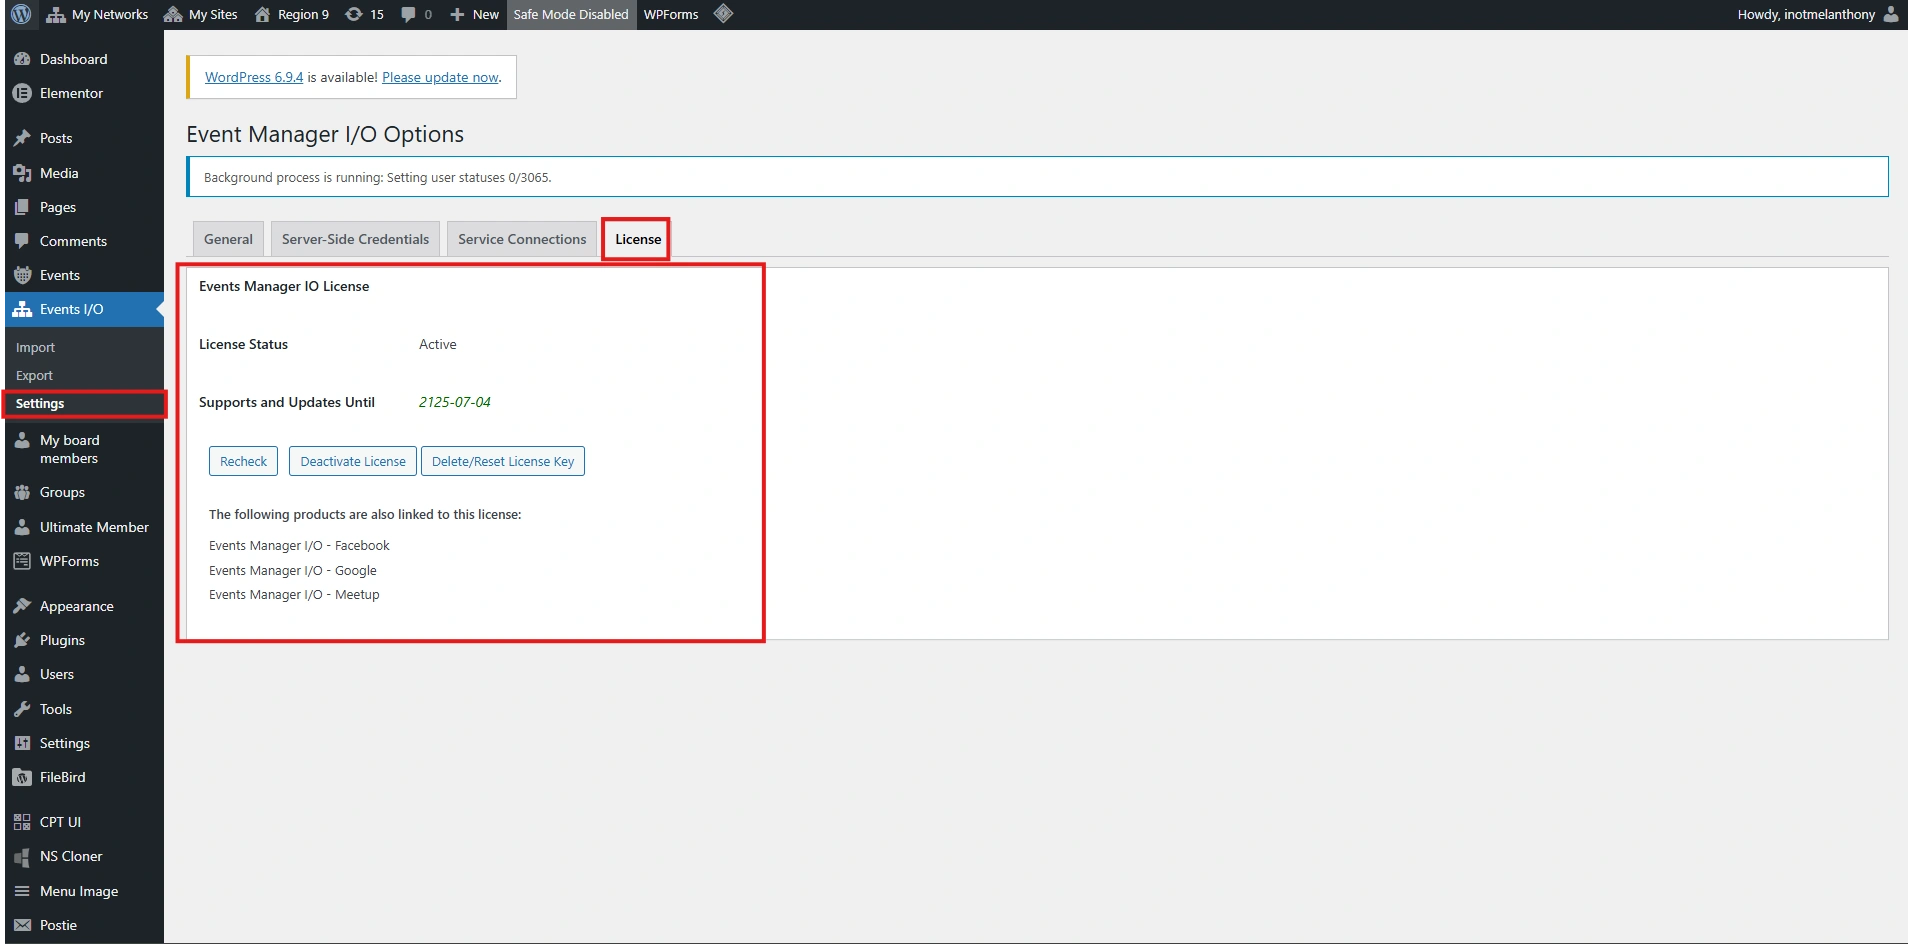
The Events Manager menu allows administrators to create and manage events, locations, bookings, and event-related settings. This section is used to organize event schedules and manage attendee registrations.
Ultimate Manager
The Ultimate Member menu provides tools for managing user profiles, membership features, and access control across the website. Administrators use this section to configure user registration, login, and profile management functionality.
The plugin license verification ensures that premium plugins such as Elementor, WPForms, Events Manager, and Ultimate Member are activated with a valid license key. Verifying the license enables access to premium features, addon functionality, and plugin updates, helping maintain compatibility and proper functionality across the website.
Tip: You must be logged in as an Administrator to verify plugin licenses. Ensure that a valid license key is entered and that the license status shows Active. If the license is inactive or expired, some premium features and automatic updates may not be available.
(D) Configure Payment Gateways
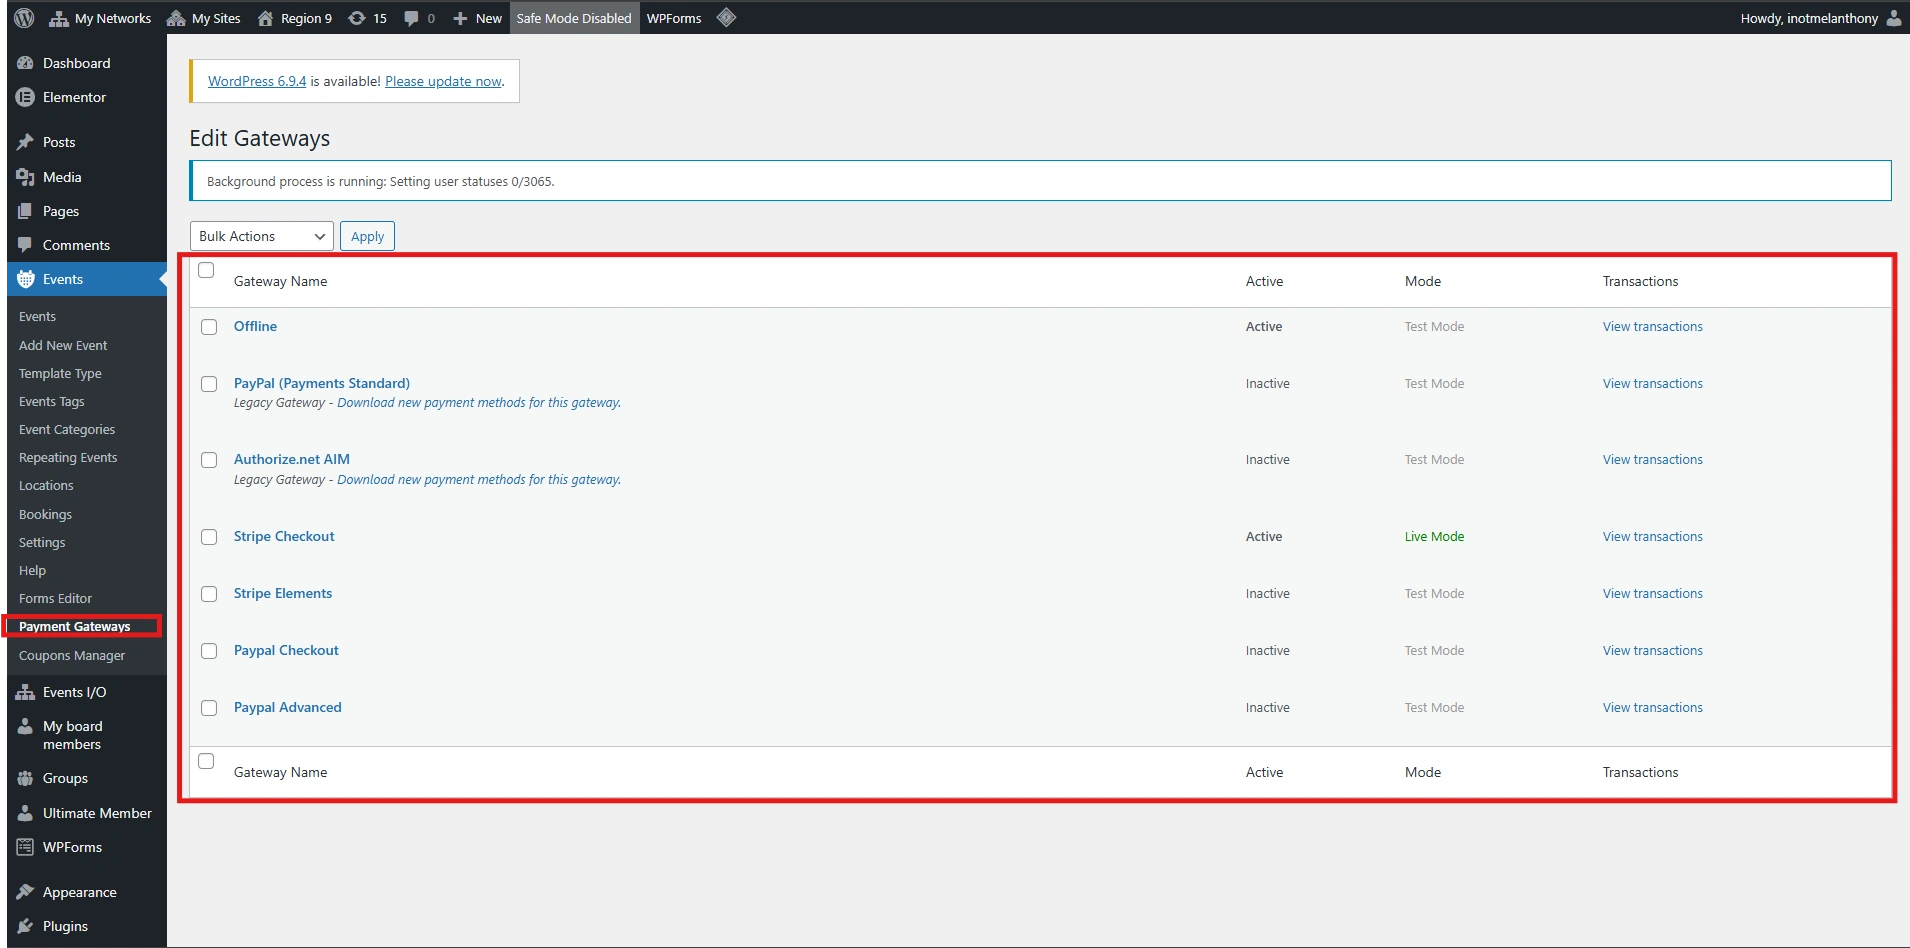
1. Event Manager
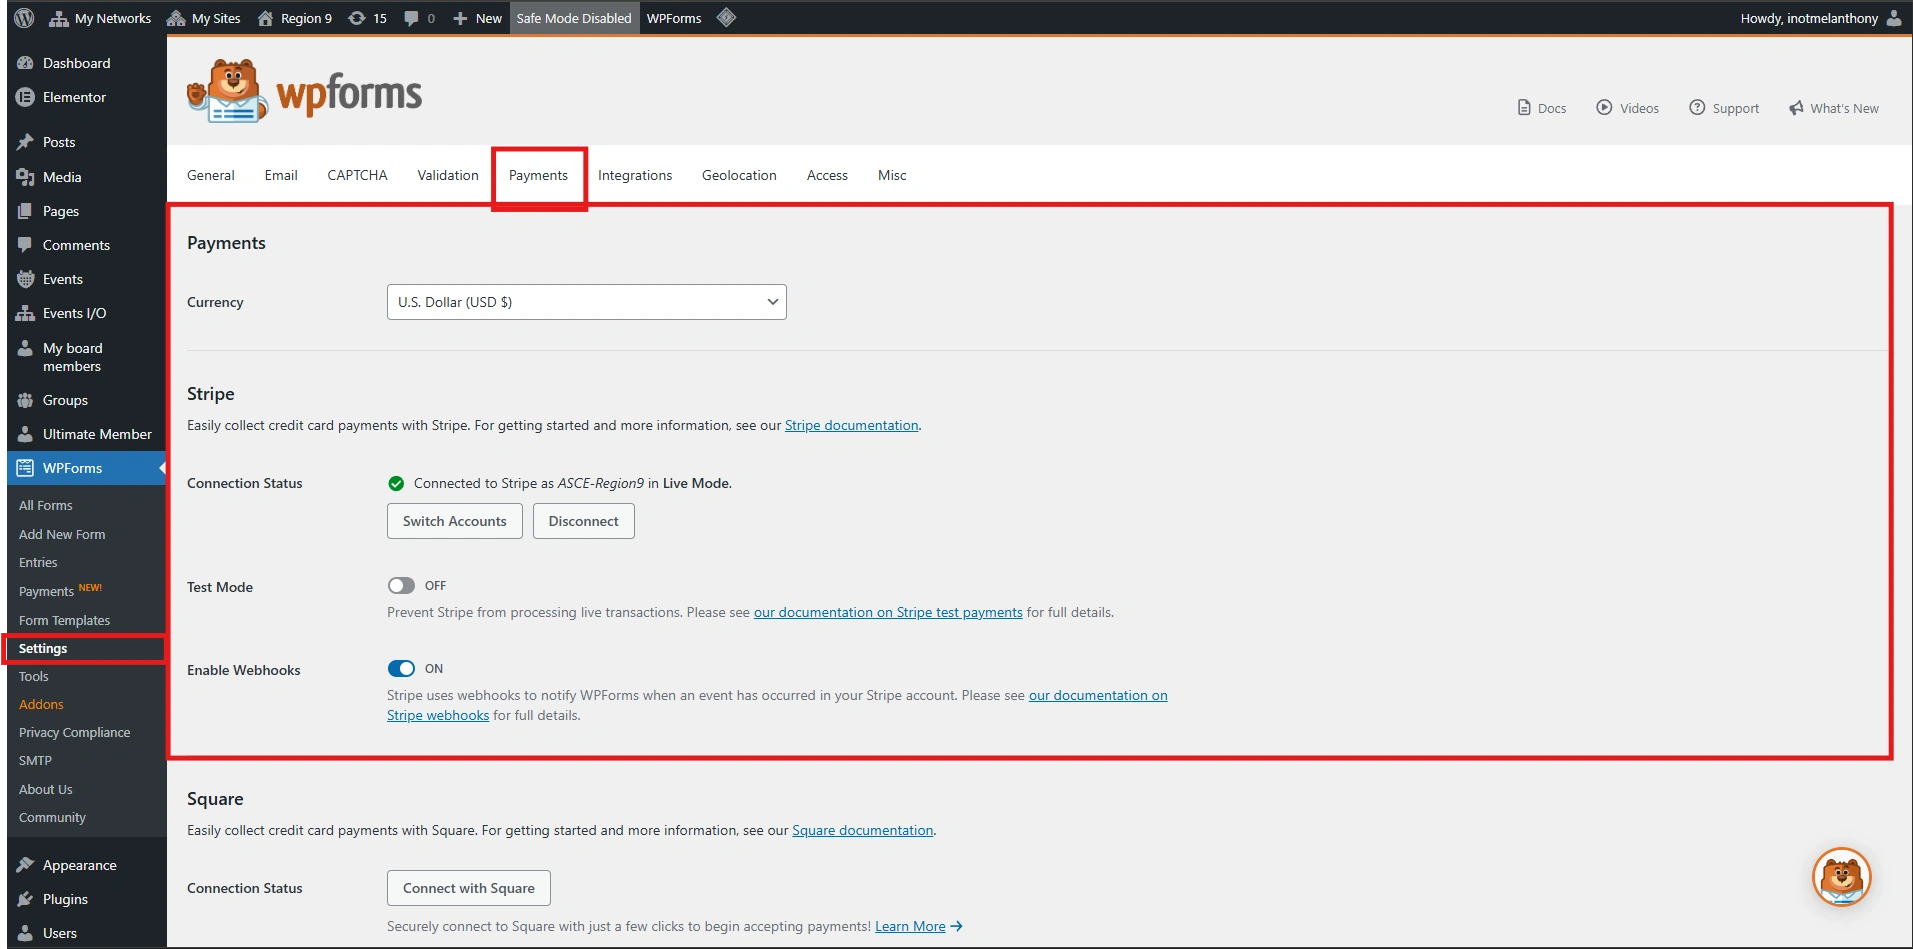
2. WPForms
Event Manager
The Events Manager payment gateway settings allow administrators to configure and manage payment methods for event bookings. This section is used to enable gateways such as PayPal, Stripe, or offline payments, allowing users to securely pay for event registrations.
WPForms
The WPForms payment gateway settings allow administrators to connect payment services such as PayPal, Stripe, or Square to forms. This enables forms to collect payments, donations, or registration fees directly from users through secure payment processing.
The payment gateway configuration ensures that payment services used by plugins such as Events Manager and WPForms are properly connected and functioning. Administrators can enable supported gateways, configure API keys or credentials, and manage payment settings to allow secure transactions for bookings, registrations, or other paid services on the website.
Tip: You must be logged in as an Administrator to configure payment gateway settings. Ensure that the correct API keys or credentials are entered for the selected payment provider (e.g., PayPal, Stripe). It is recommended to test the payment gateway in sandbox or test mode before enabling live transactions.
(E) Google ReCaptcha Keys
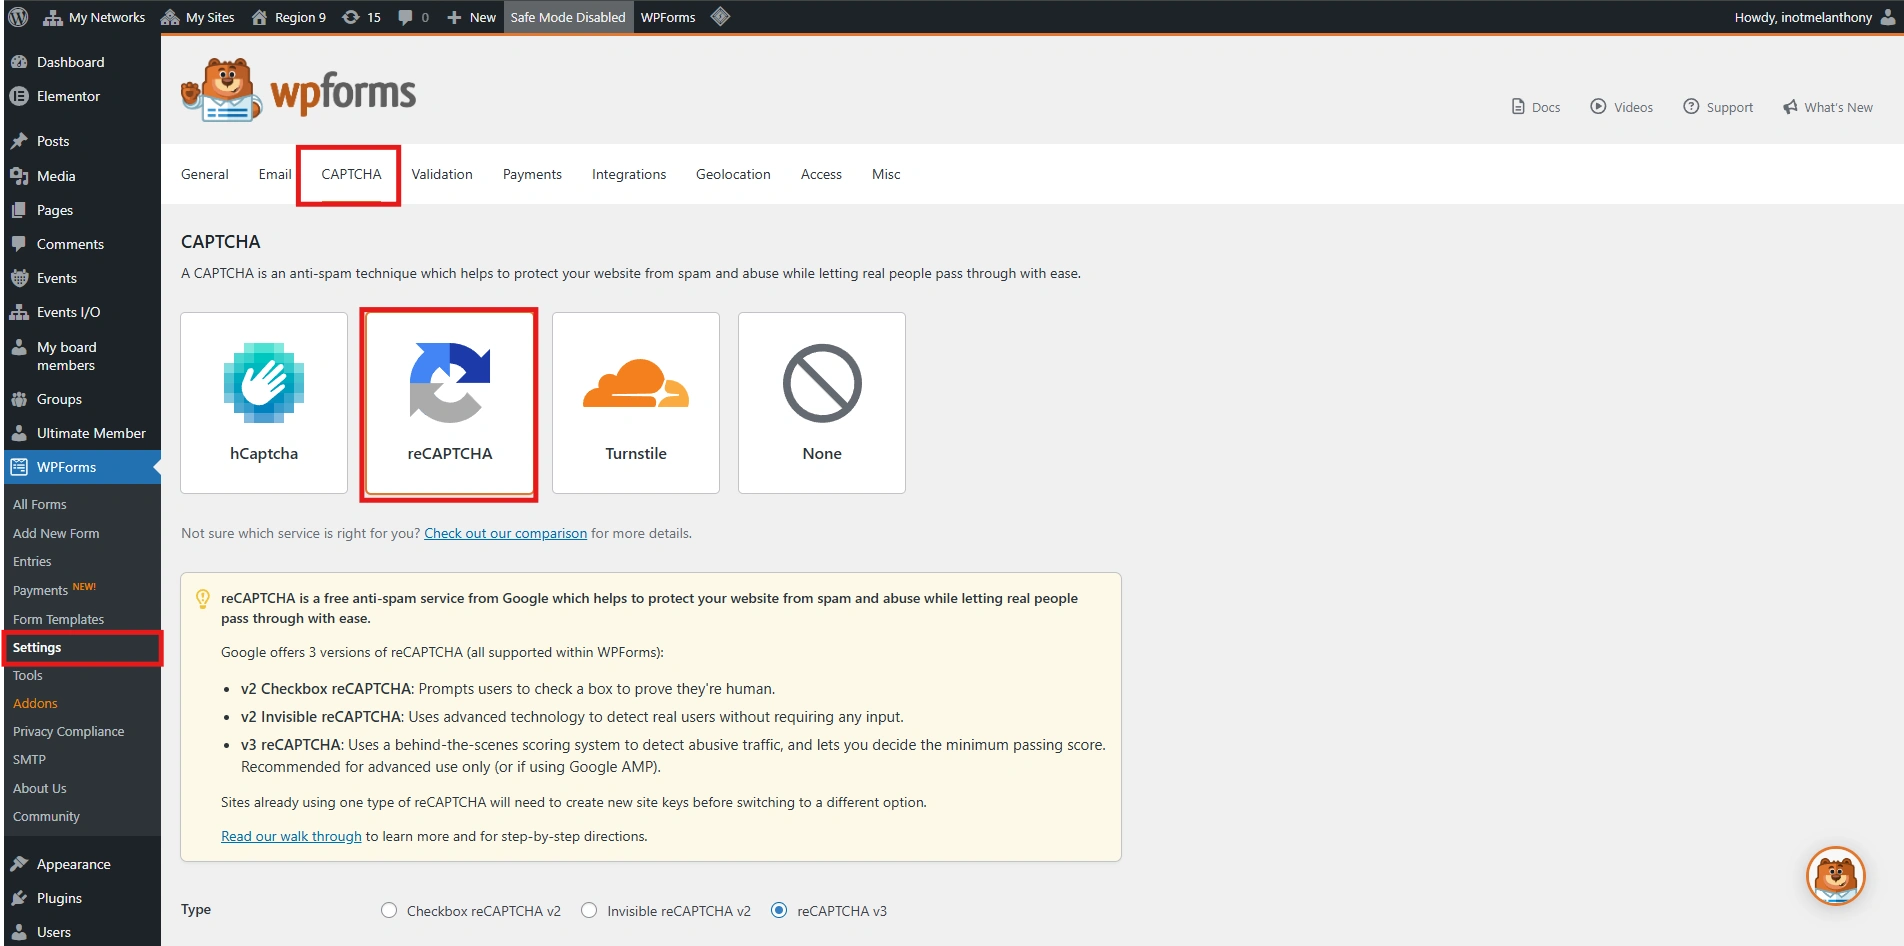
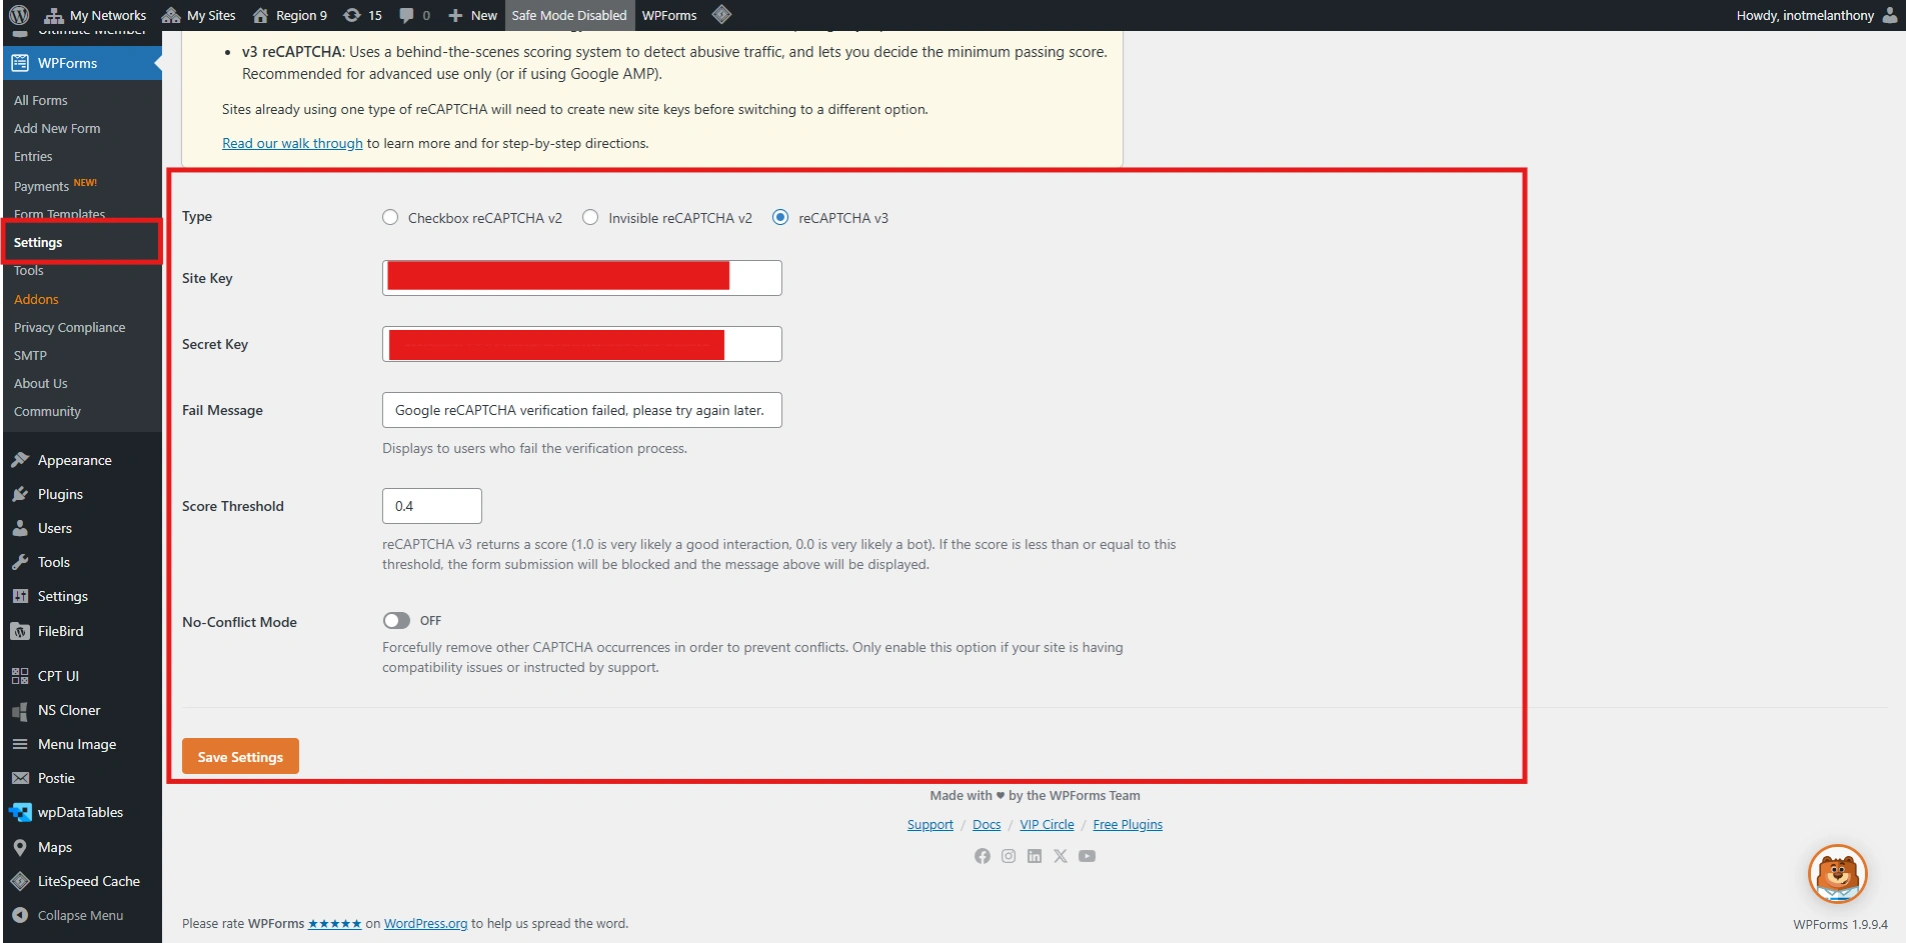
1. WPForms (Captcha Tab)
2. WPForms (Captcha Keys)
WPForms
The WPForms CAPTCHA settings allow administrators to configure Google reCAPTCHA to protect forms from spam submissions. Administrators can enter the reCAPTCHA Site Key and Secret Key, select the reCAPTCHA version, and apply CAPTCHA protection to forms across the website.
The Google reCAPTCHA configuration ensures that forms used by plugins such as WPForms and Events Manager are protected from spam and automated submissions. Administrators can enter the reCAPTCHA Site Key and Secret Key obtained from the Google reCAPTCHA console to enable verification on forms and improve website security.
Tip: You must be logged in as an Administrator to configure Google reCAPTCHA settings. Make sure that the Site Key and Secret Key generated from the Google reCAPTCHA dashboard are correctly entered. It is recommended to verify that the reCAPTCHA widget appears and functions properly on forms after configuration.
(F) Postie Configuration
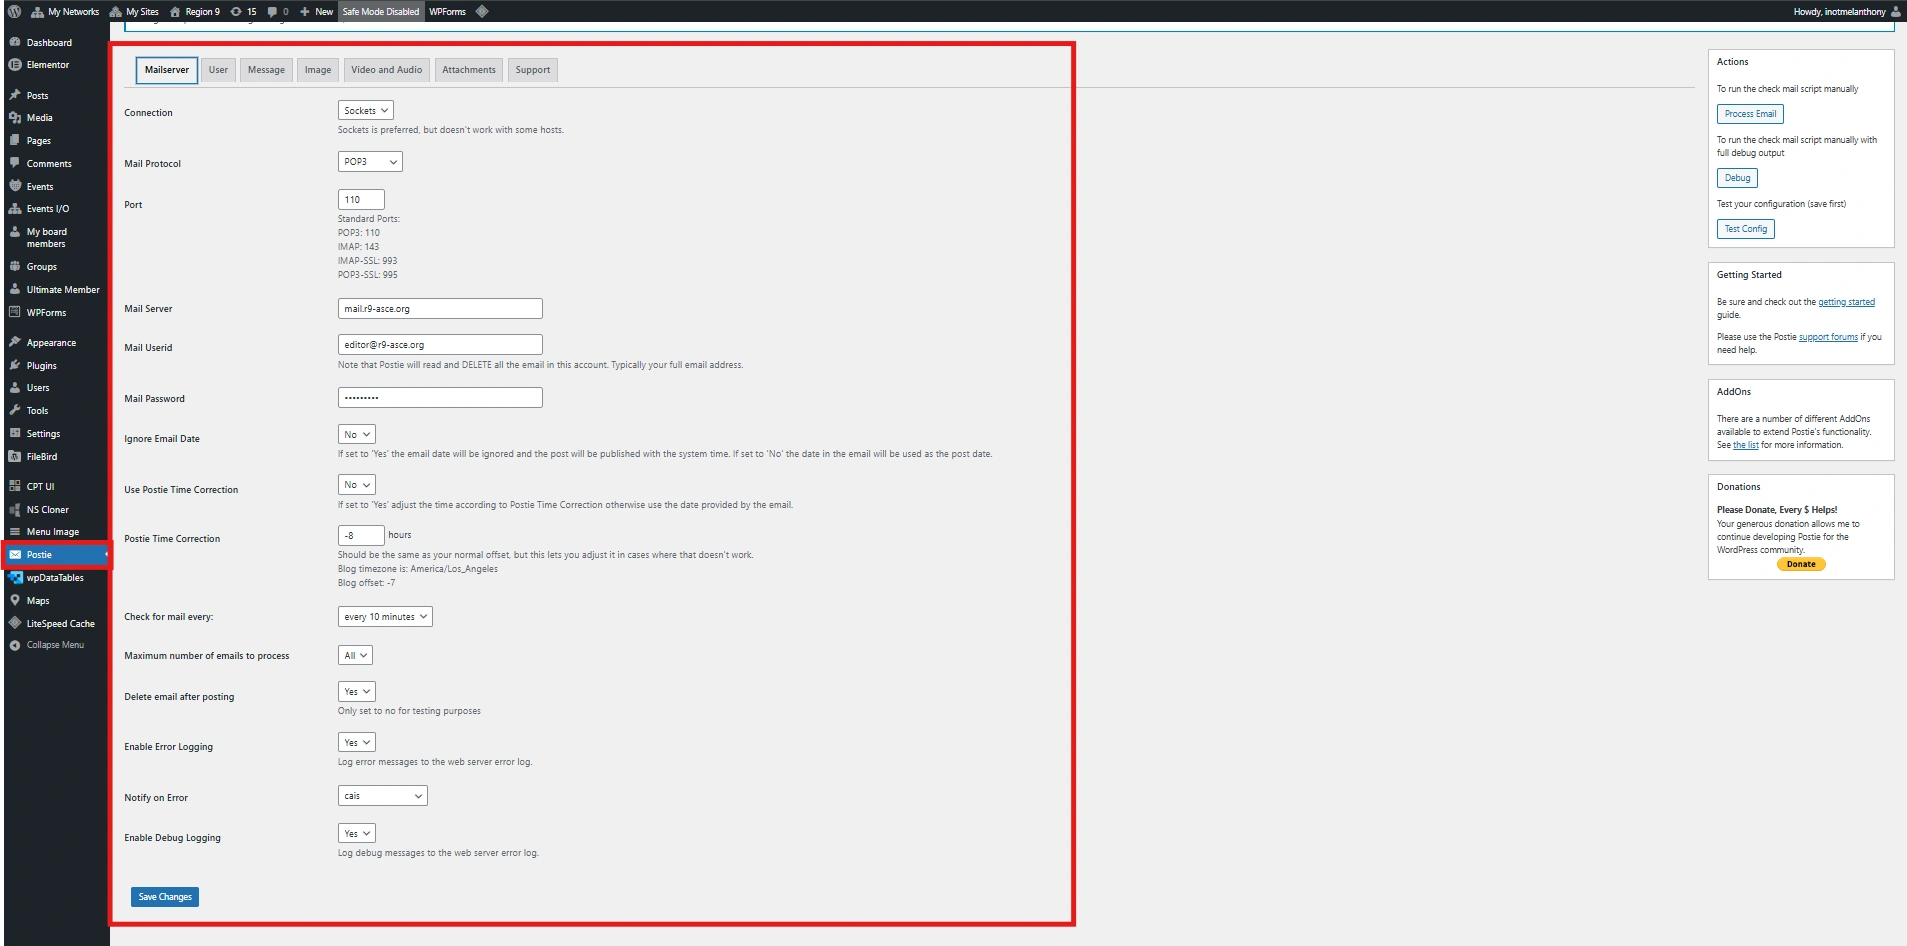
1. Postie (mailserver)
2. Postie (user)
3. Postie (message)
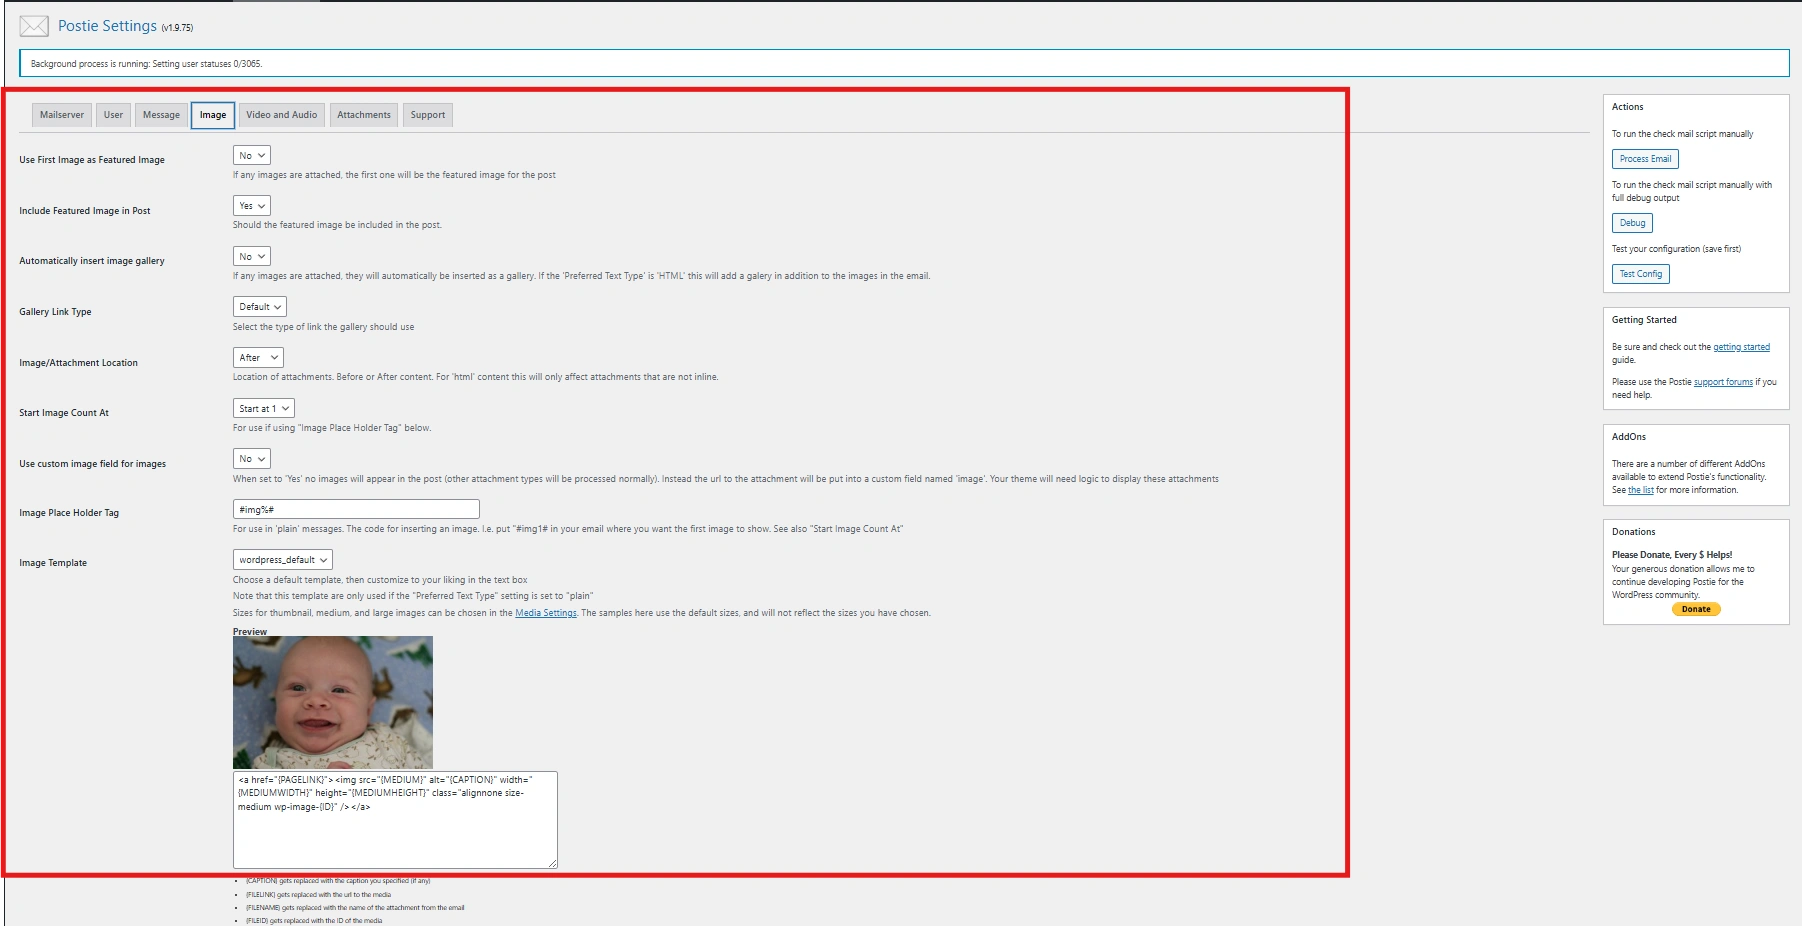
4. Postie (image)
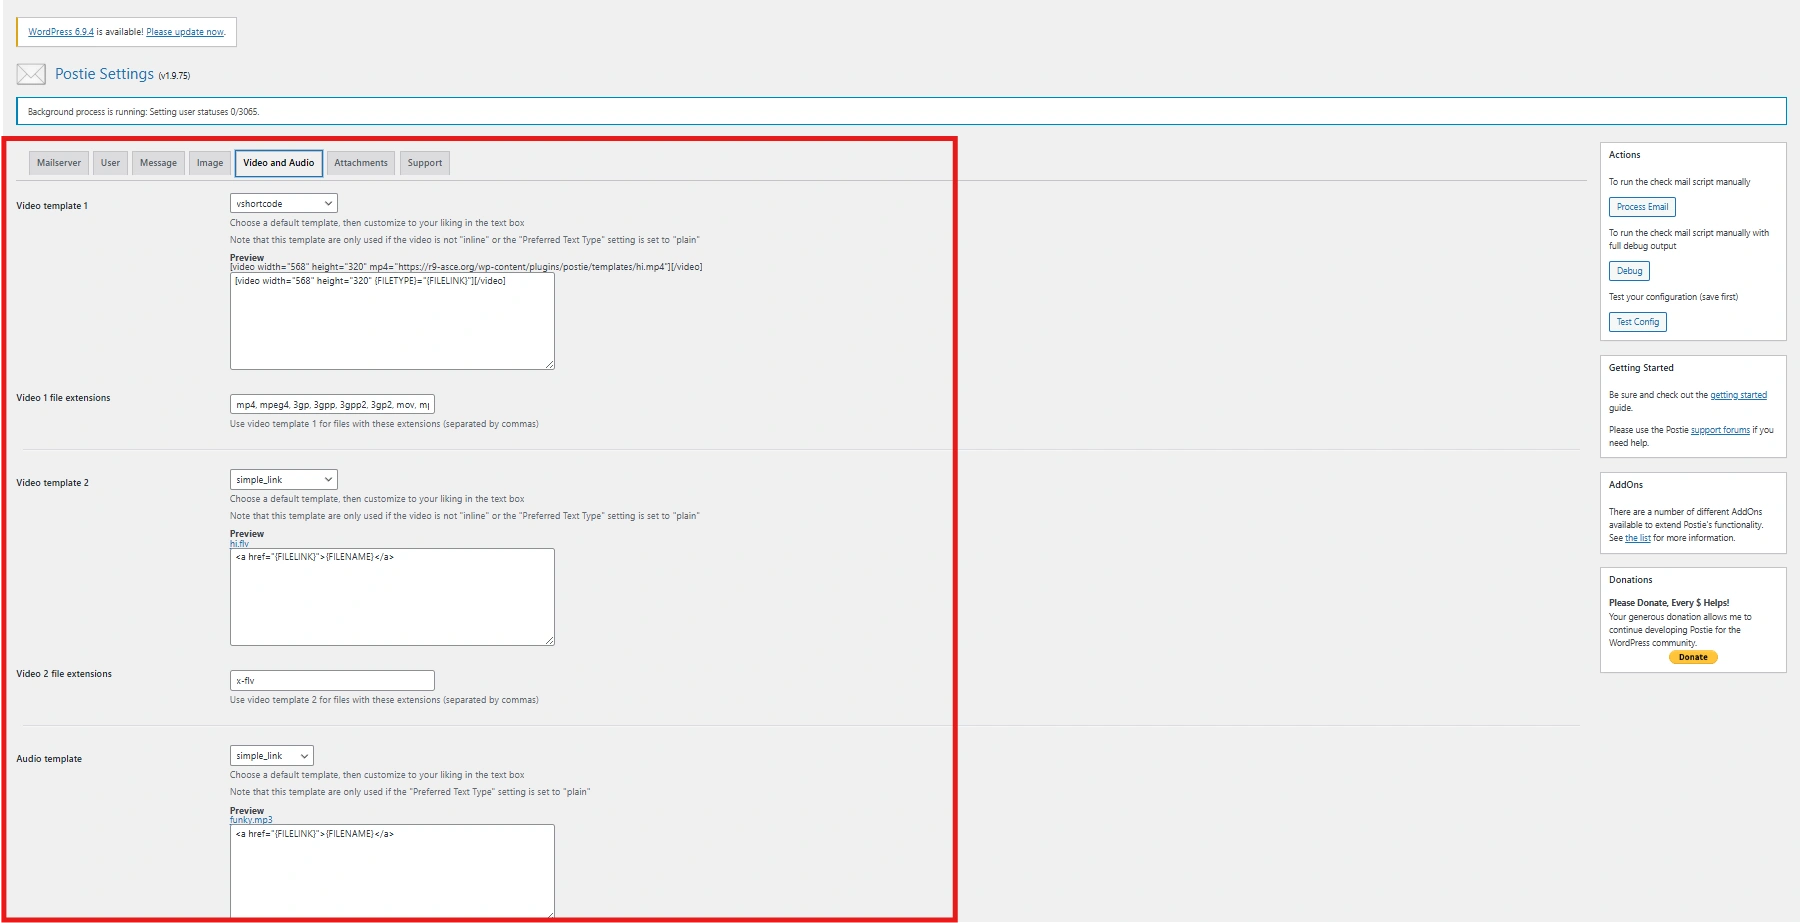
5. Postie (video/audio)
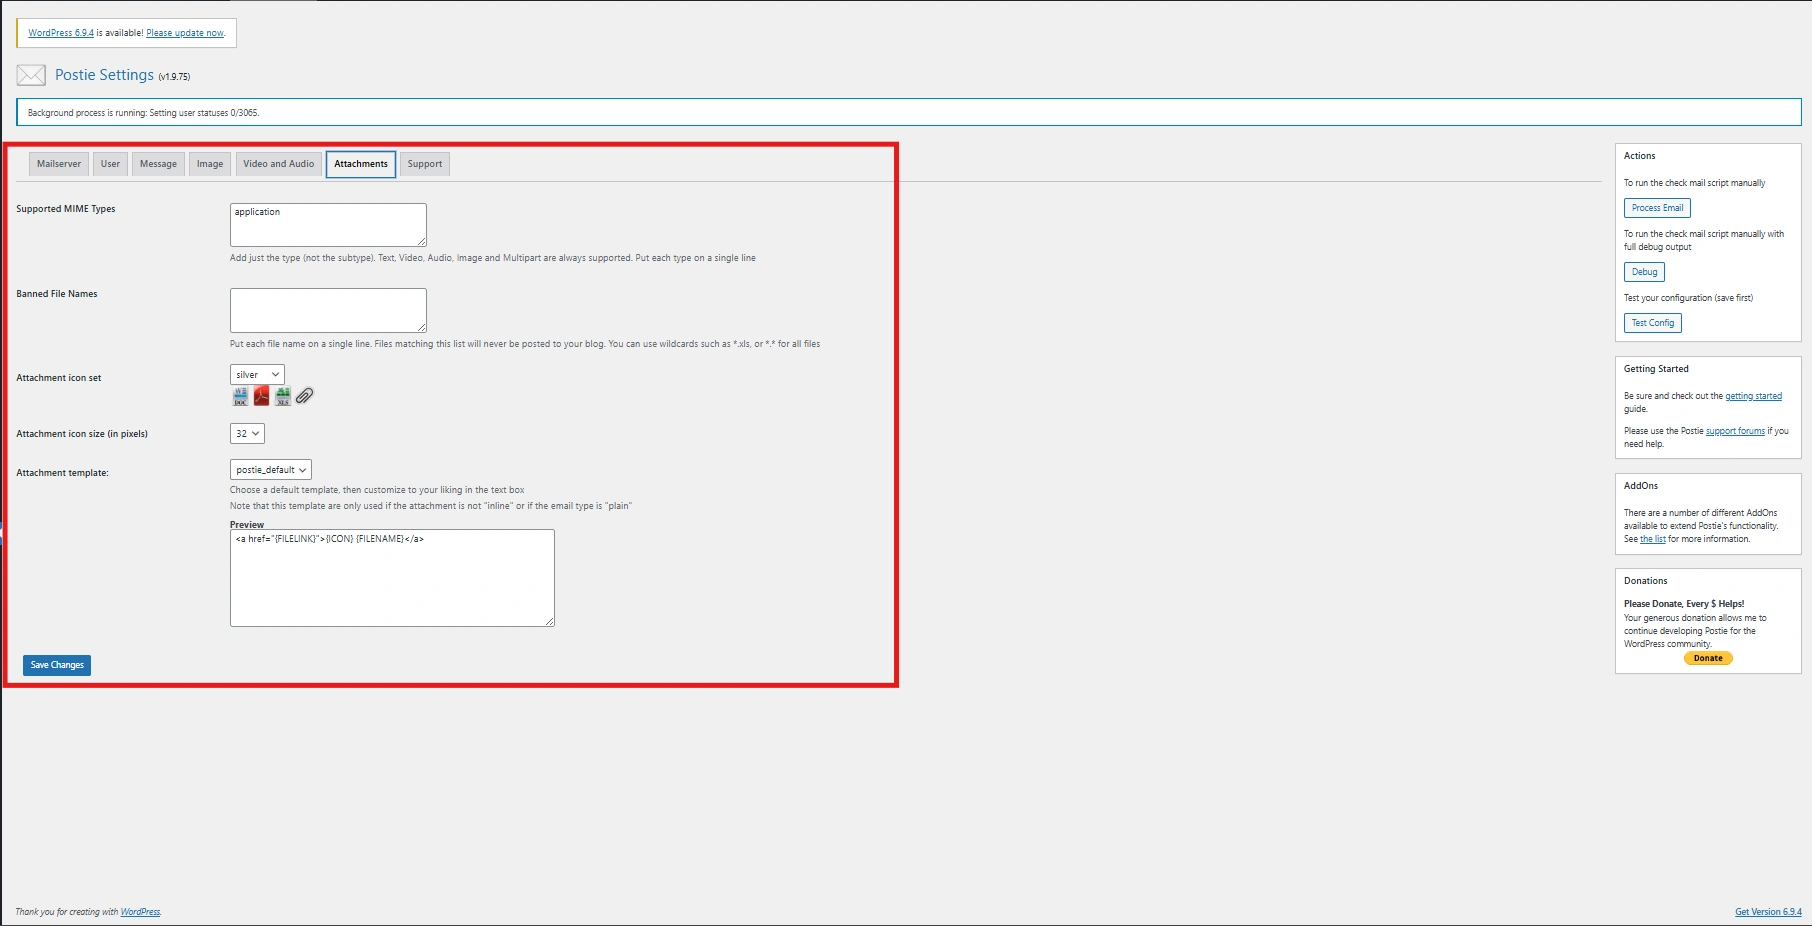
6. Postie (Attachment)
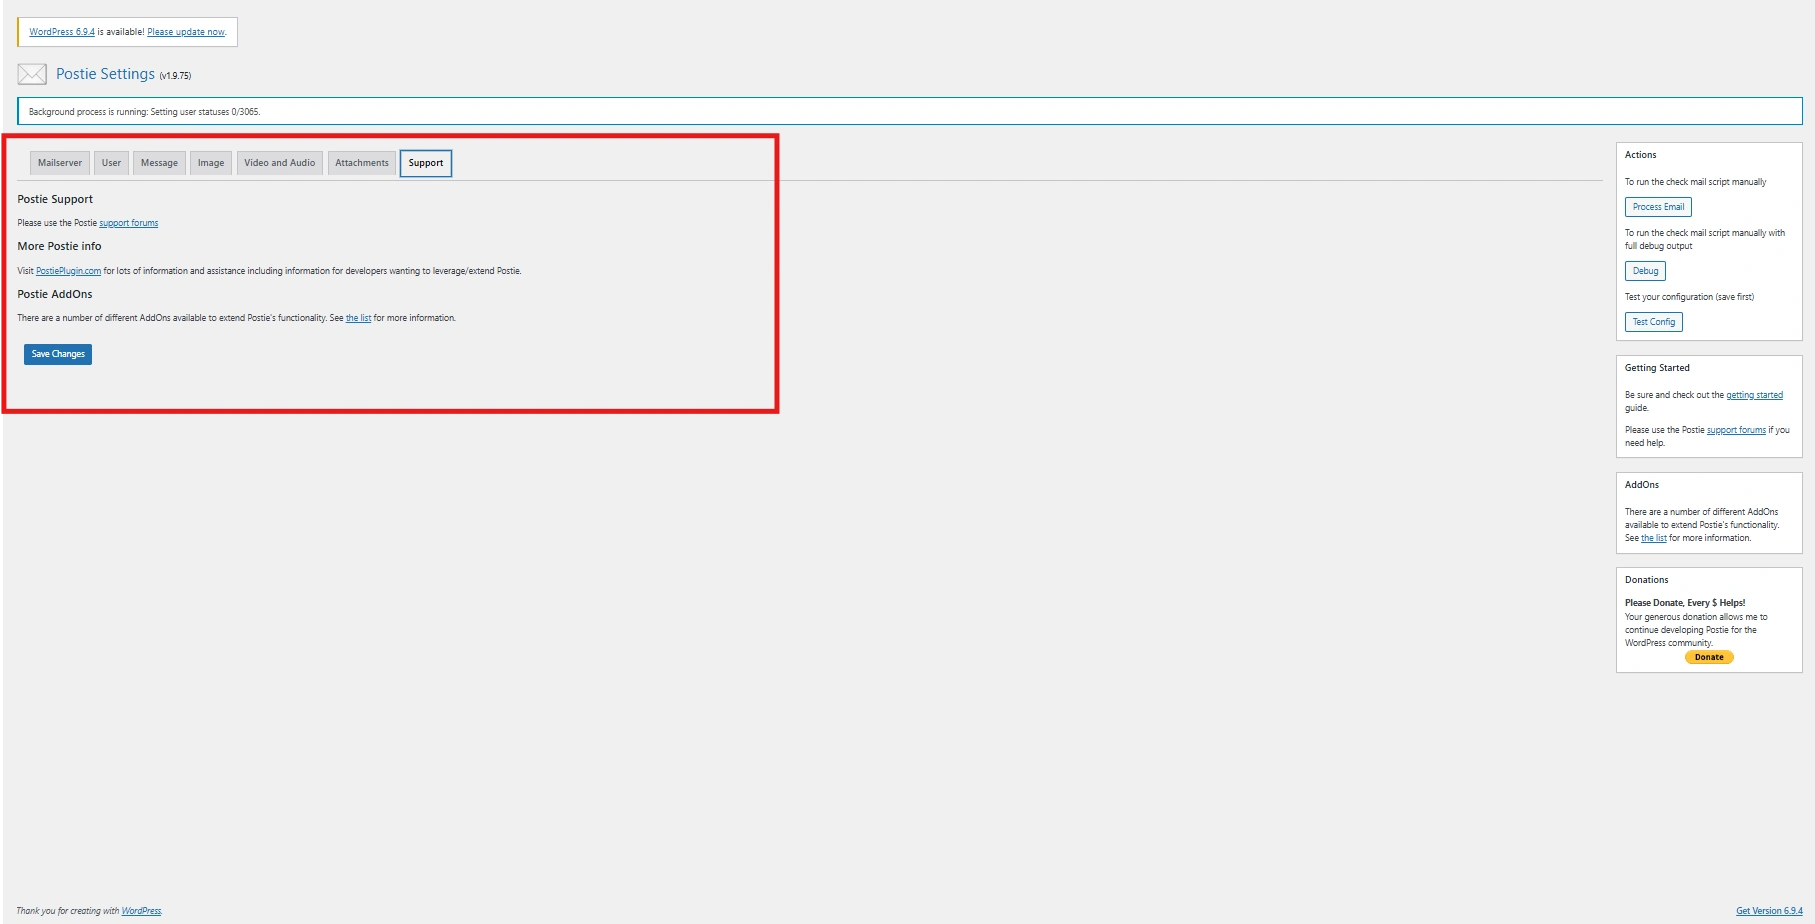
7. Postie (Support)
Mailserver
The Mail Servers settings allow administrators to configure the email server that Postie will connect to. This includes selecting the mail protocol (POP3 or IMAP), entering the mail server address, port, and connection security settings. These settings enable WordPress to retrieve incoming emails from the configured mailbox.
User
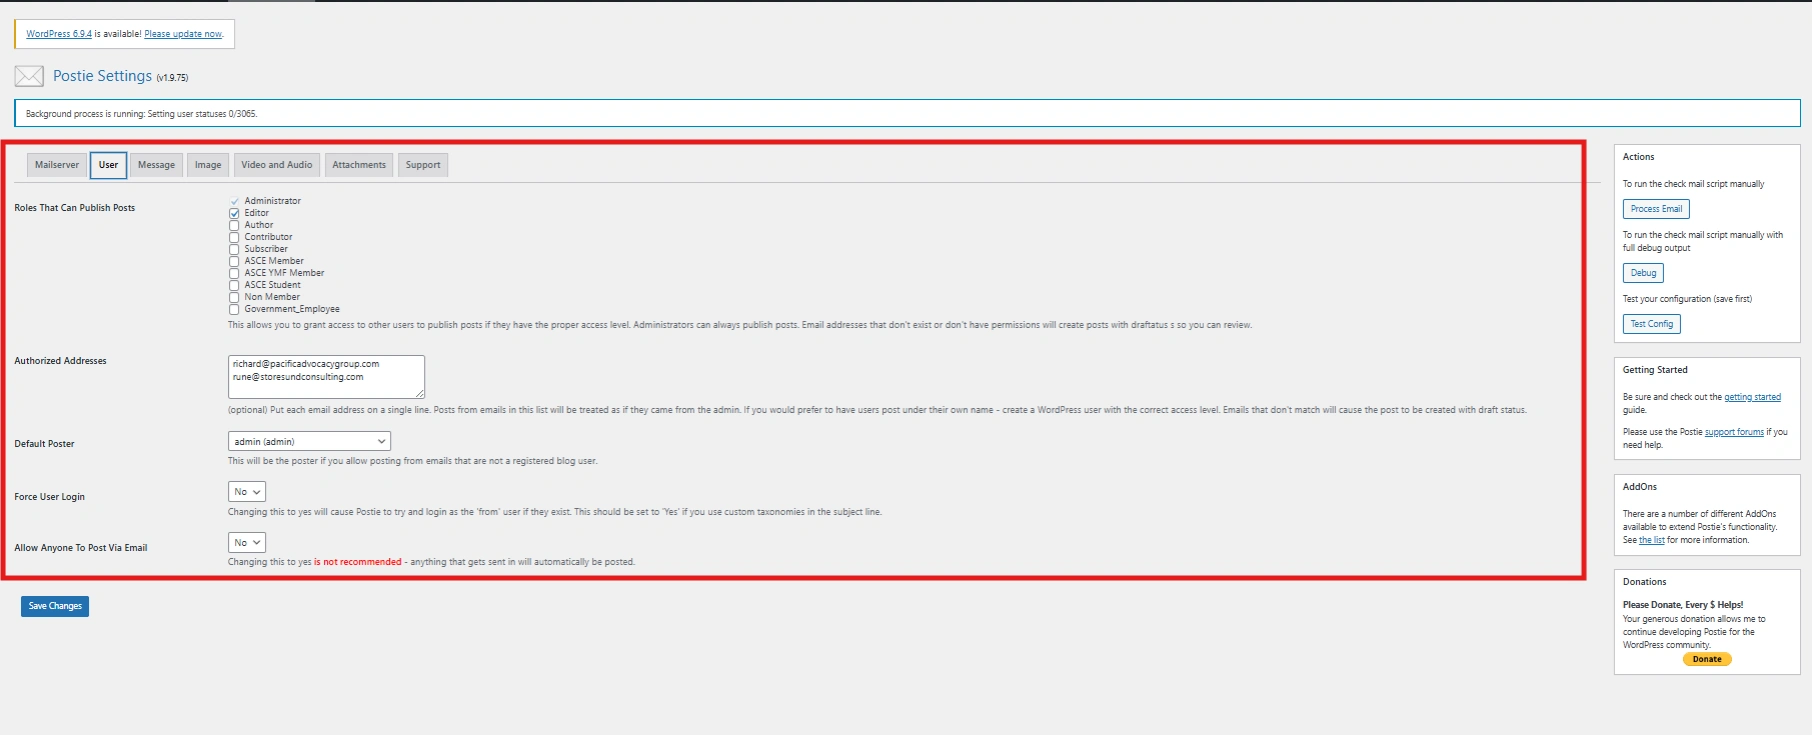
The User settings determine which WordPress user account will be assigned as the author of posts created from incoming emails. Administrators can configure default users, restrict which email addresses are allowed to submit posts, and manage permissions for email-based publishing.
Message
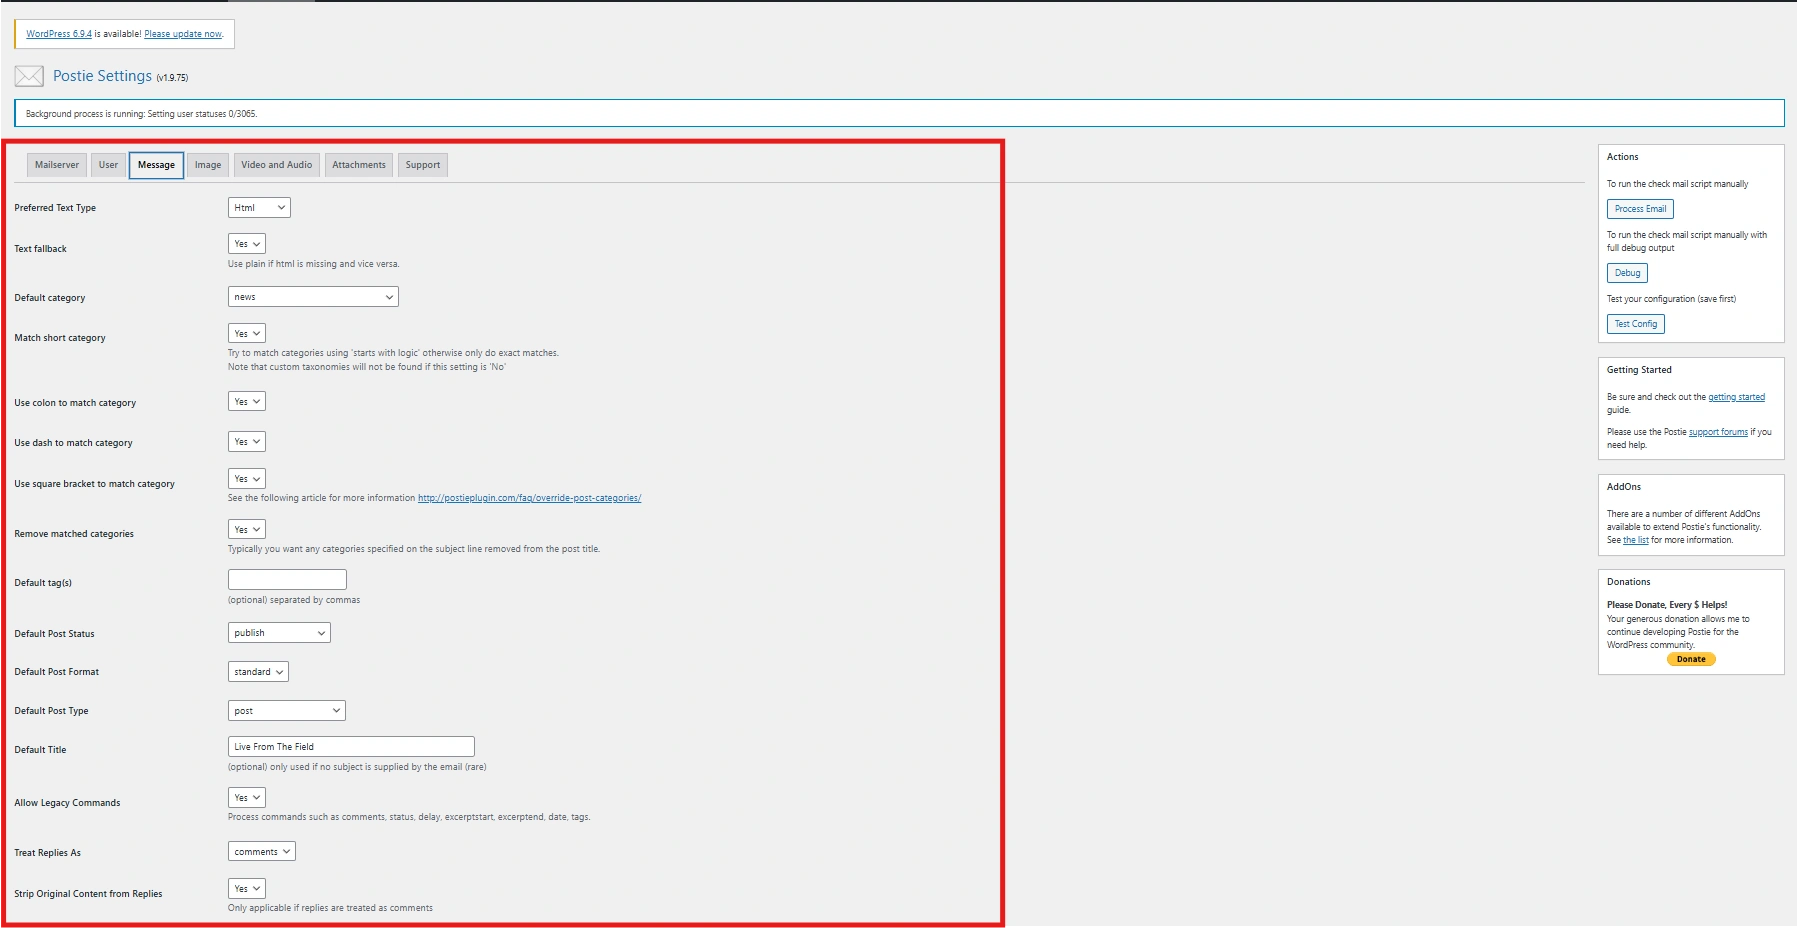
The Message settings control how email content is processed when creating posts. Administrators can configure how the email subject and body are converted into post titles and content, as well as define formatting and content filtering rules.
Image
The Image settings manage how images included in emails are handled. Postie can automatically download images embedded in emails and attach them to the created post, allowing images to be displayed within the post content.
Video/Audio
The Video and Audio settings allow Postie to process media links or attachments found in incoming emails. Supported media files can be embedded or attached to the generated post, enabling multimedia content to be included automatically.
Attachments
The Attachments settings control how file attachments from incoming emails are handled. Administrators can allow or restrict attachments, define allowed file types, and determine how attachments are stored and linked within posts.
Support
The Support section provides access to troubleshooting tools, configuration help, and plugin documentation. Administrators can review diagnostic information, check plugin status, and access support resources if issues occur with email processing.
The Postie configuration enables WordPress to retrieve emails from a designated mailbox and automatically convert them into posts or content entries on the website. By configuring the mail server connection, user permissions, and message handling settings, administrators can control how incoming emails are processed and published.
Postie can extract the email subject as the post title, convert the email body into post content, and handle images, media files, and attachments included in the message. This allows content to be submitted and published directly through email without accessing the WordPress dashboard.
Administrators can also configure rules for authorized senders, formatting behavior, attachment handling, and content filtering to ensure that only valid messages are processed. Proper configuration helps automate content publishing while maintaining control over how email submissions appear on the website.
Tip: You must be logged in as an Administrator to configure Postie settings. Ensure that the correct mail server credentials, port, and connection security (POP3 or IMAP) are entered before saving the configuration. It is recommended to test the mailbox connection to confirm that Postie can successfully access the email account.
For best results, use a dedicated mailbox specifically for Postie to avoid processing unrelated emails. You should also verify that the mail server allows external connections and that firewall or hosting restrictions do not block the connection.
After configuration, send a test email to the configured mailbox to confirm that Postie can retrieve the message and convert it into a post successfully. If emails are not being processed, check the Postie logs and scheduled mail check settings to troubleshoot connection or authentication issues.